Shelf's Chat Deflection with CXOne - Configuration Guide
Purpose
This document describes steps that are necessary to set up and configure Shelf's Chat Deflection with CXOne.
If you require further assistance, please do not hesitate to contact us at support@shelf.io, via the live chat on the Shelf website or from the in-app chat support within the Shelf platform.
Last Update: 28-May 2021
1 Prerequisites
1.1 How to get Library ID
1. Click on the library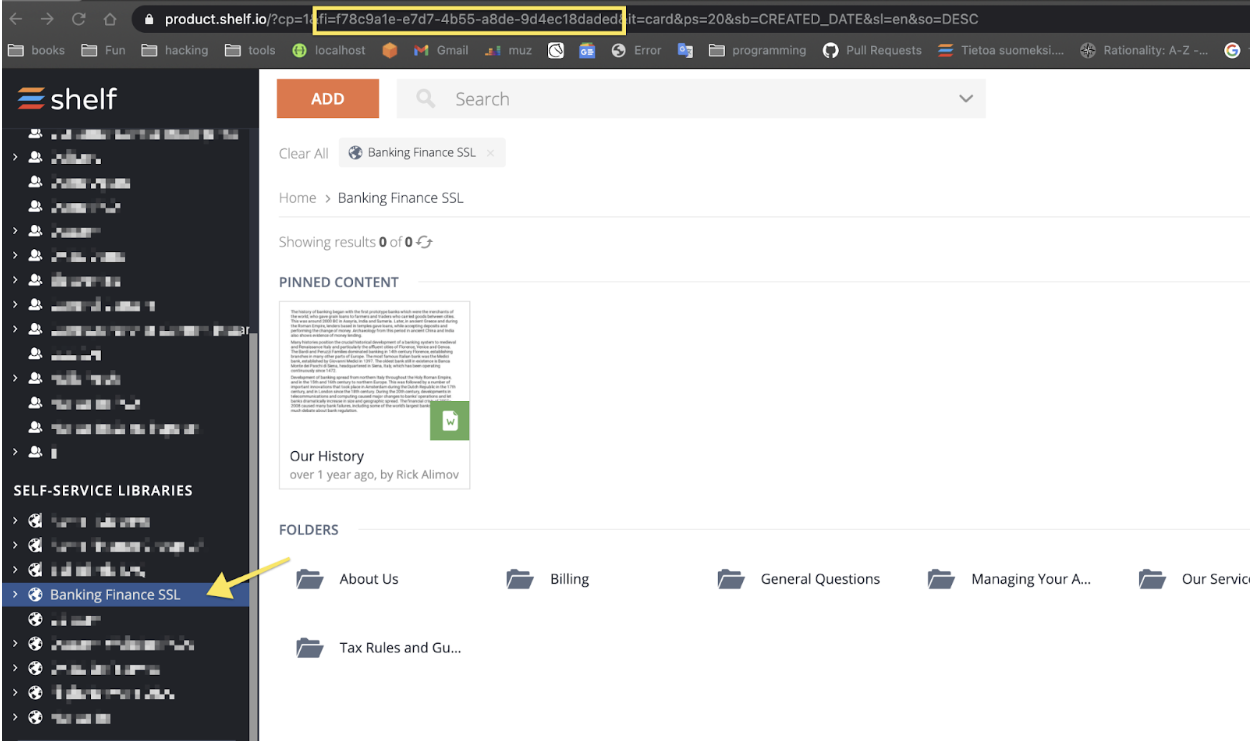
2. Copy from the url value after fi= and until next & sign
Another way would be to right click the library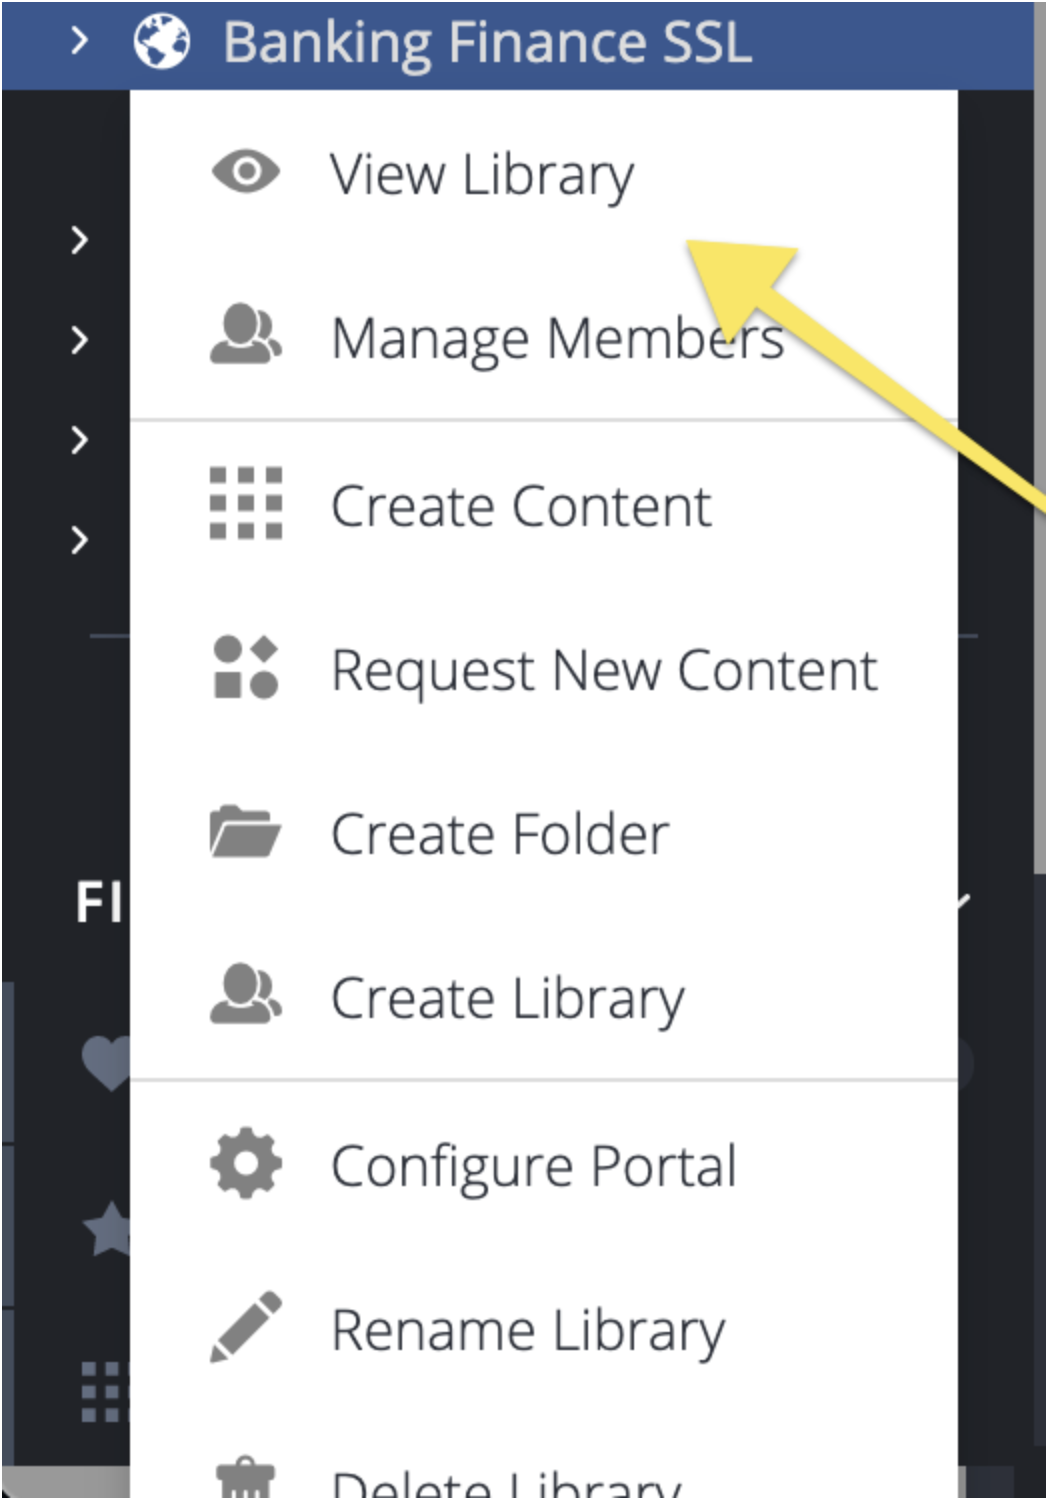
Another way would be to right click the library
3. Click view library
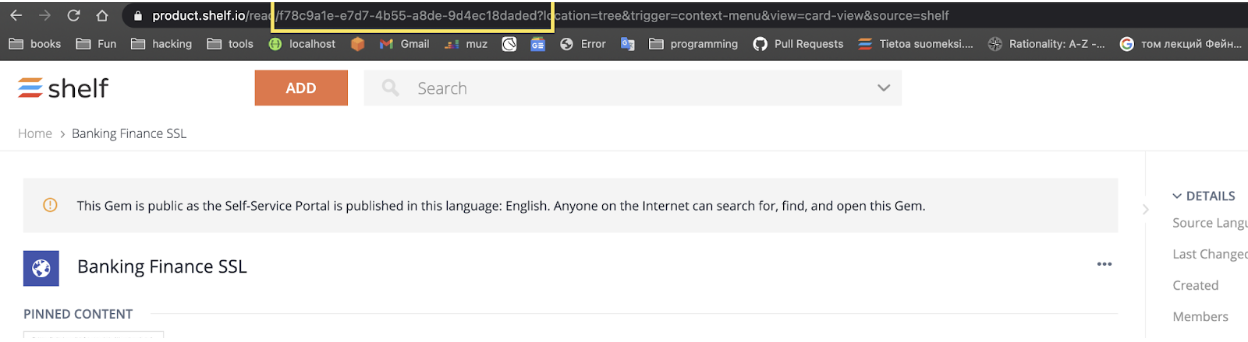
After library opened there will be URL in your browser representing the library in format:
https://your-subdomain.shelf.io/read/LIBRARY_ID?some-other
https://your-subdomain.shelf.io/read/LIBRARY_ID?some-other
1.2 How to get account ID
1. Open the admin panel, click Single Sign-On and click copy button with Account ID field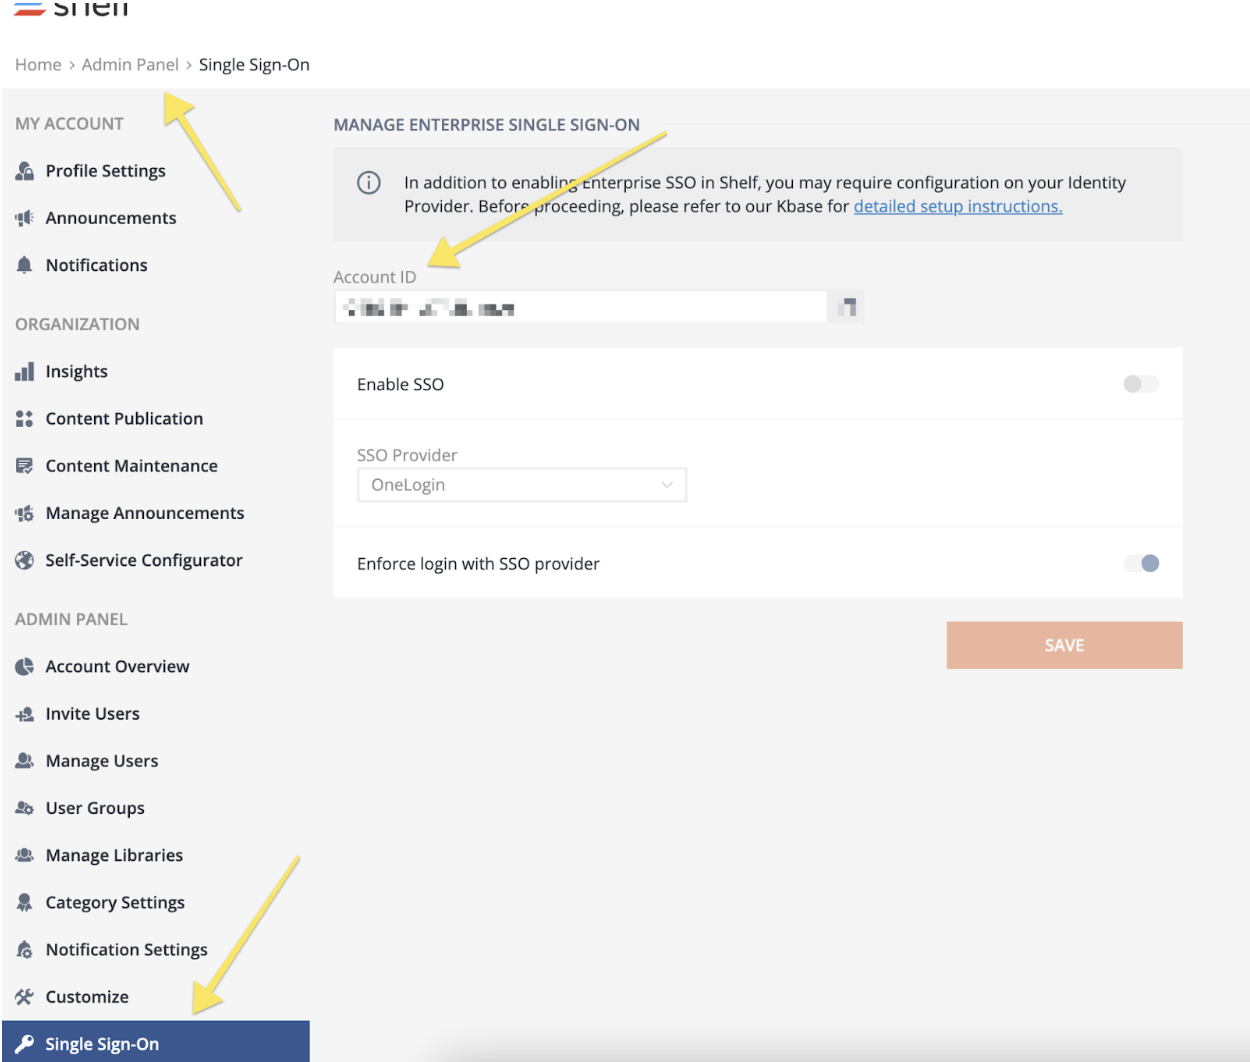
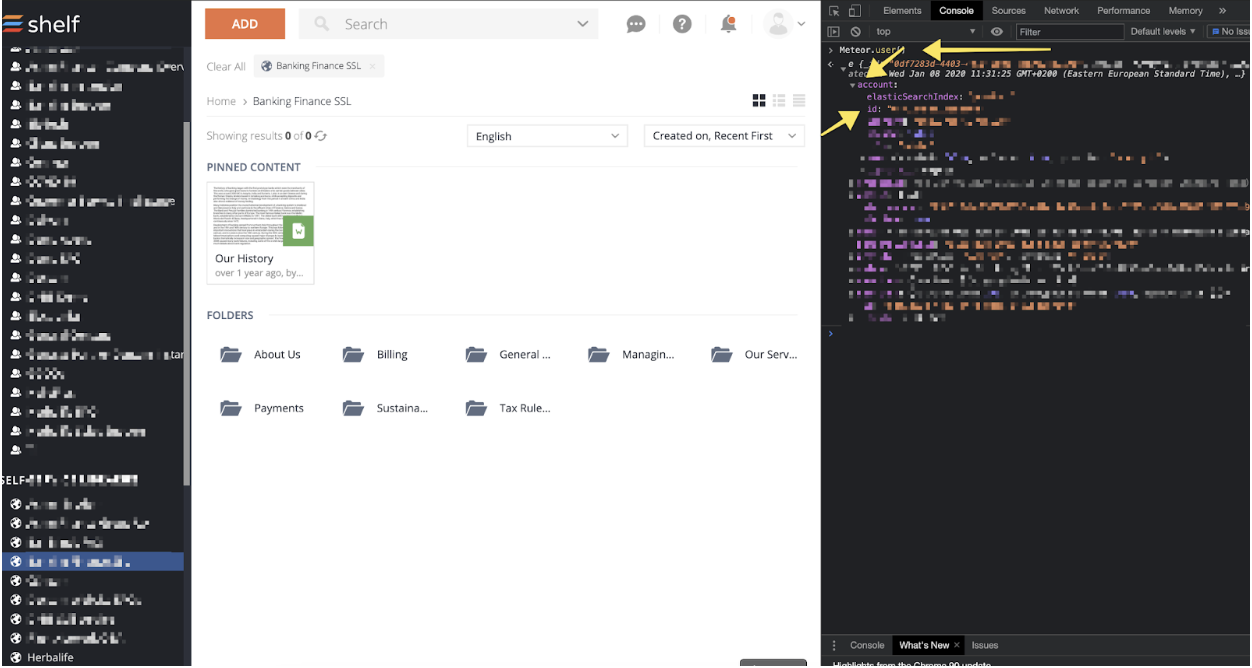
If you have no such possibility, you can copy it from the dev-tools while the library is opened.
You would need to write command
Meteor.user()
And from the response choose: account -> id
Meteor.user()
And from the response choose: account -> id
Another way would be paste this script into the dev-tools and Account ID will be automatically copied to the clipboard
javascript:const copyToClipboard=e=>{const t=document.createElement("textarea");t.value=e,t.setAttribute("readonly",""),t.style.position="absolute",t.style.left="-9999px",document.body.appendChild(t);const o=!!(0<document.getSelection().rangeCount)&&document.getSelection().getRangeAt(0);t.select(),document.execCommand("copy"),document.body.removeChild(t),o&&(document.getSelection().removeAllRanges(),document.getSelection().addRange(o)),alert("Copied to clipboard")};copyToClipboard(localStorage.getItem("Meteor.loginToken"));
2 Create Studio Script
- Click on new script
- From the window choose “Chat”
- Hit OK button

- Find tools section, click it
- Choose “Begin” from the Studio Actions list

- Put it anywhere on the canvas. It is the start of the conversation. Indicates that conversation is started and someone opened a chat window
- Next one would typically be adding AskCaller action, to give a context within the conversation and send a greeting. Choose “AskCaller” action from the list and place it on the canvas
- Right click on the “AskCaller” action you just added and click on the right corner of the “message” row to popup the window. Enter the message in plain text.

- Now we need to set timeout (2) and set variable that will store the value of the message typed by the customer (1)

More about this you can find here
10. Find the snippet from the actions list and place it on the canvas. This is the main working code that will run the Shelf API queries to fetch content recommendations.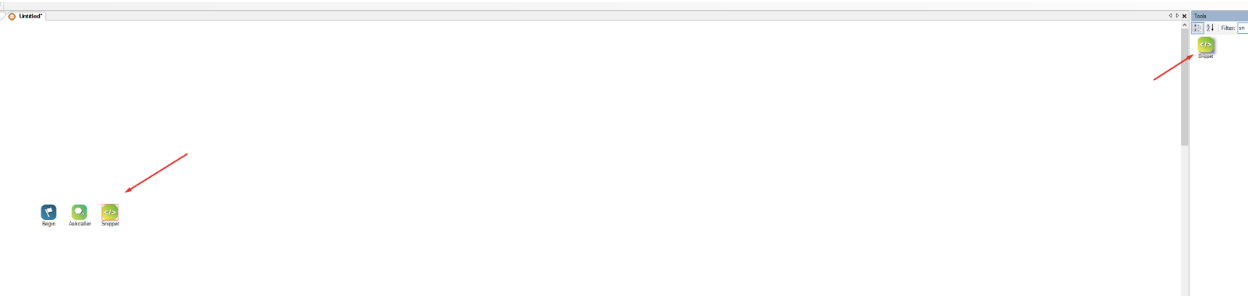
11. Afterwards hit right click on the newly added “Snippet” action and click “edit”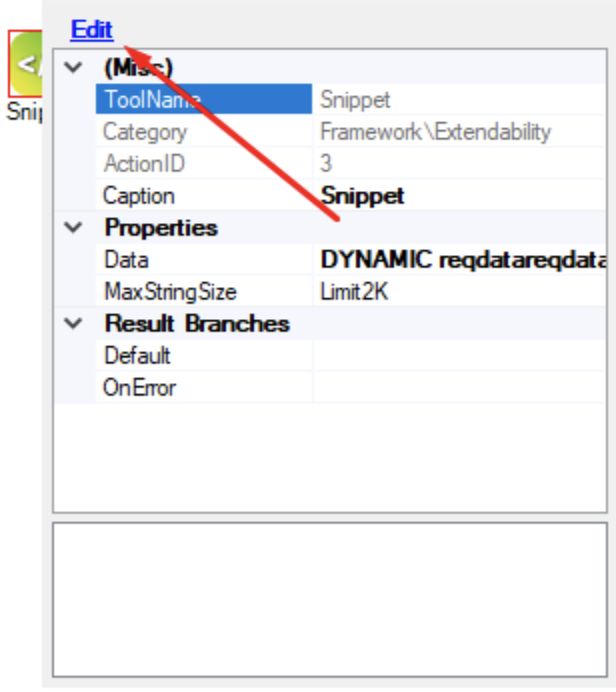
12. In the new window switch to the text view, and paste code below
DYNAMIC reqdata reqdata.text="{query}" DYNAMIC library_ids library_ids[1]="LIBRAY_ID" reqdata.library_ids=library_ids reqdata.account_id="ACCOUNT_ID" reqdata.language="en" ASSIGN body="{reqdata.asjson()}" proxy=GetRESTProxy() proxy.ContentType="application/json" ASSIGN gems=proxy.MakeRestRequest("https://api.shelf.io/recommendations/gems/recommendations_self_service",body,0,'Post') ASSIGN t1="{gems.recommendations[1].title}" ASSIGN gemPageURL1="{gems.recommendations[1].publicURL}" ASSIGN description1="{gems.recommendations[1].description}" ASSIGN t2="{gems.recommendations[2].title}" ASSIGN gemPageURL2="{gems.recommendations[2].publicURL}" ASSIGN description2="{gems.recommendations[2].description}" ASSIGN t3="{gems.recommendations[3].title}" ASSIGN gemPageURL3="{gems.recommendations[3].publicURL}" ASSIGN description3="{gems.recommendations[3].description}" ASSIGN RETRY=false ASSIGN newline="\n" IF gems.recommendation[0].title.size < 1 { RETRY = true } |
13. Explanations to the code:
| DYNAMIC represents some complex structure that can have in it multiple properties, arrays, objects, etc “{query}” -> is the reference to the variable that we added in step 9, it has a value of user text message GetRESTProxy function that is being used to establish communication with Shelf servers. More guidance you can find here or here |
14. Now you can add One more “AskCaller” action, to send the response from the Shelf API’s
Example response:
Example response:
Here are articles that might help you find an answer:<br> <img=src><img src="https://i.imgur.com/MnCM4IC.png width="70" height="70""> <a href="{gemPageURL1}">{t1}</a><br> <a href="{gemPageURL2}"><img src="https://i.imgur.com/MnCM4IC.png width="70" height="70""> {t2}</a><br> <a href="{gemPageURL3}"><img src="https://i.imgur.com/MnCM4IC.png width="70" height="70""> {t3}</a> |

Note: you can use variables from previous steps in this code
15. Now we need to connect all the steps. Move the mouse to the right bottom corner. Click the mouse button and connect two elements.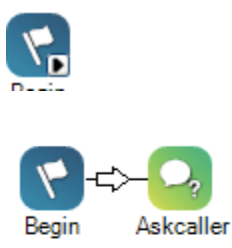
16. If the element that you are connecting has only one option available no popup windows should appear. If there are more than one possible option, popup will look like this:

It represents states of the elements when it will pass data/event/signal to the next element in the pipe. For the sake of simplicity we will connect all the possible ways one to another.

17. Now we should add and connect the final element, that indicates chat ending. It is called “End”

18. And the final step would be adding the script to the point of contact in the ACD of the CXOne
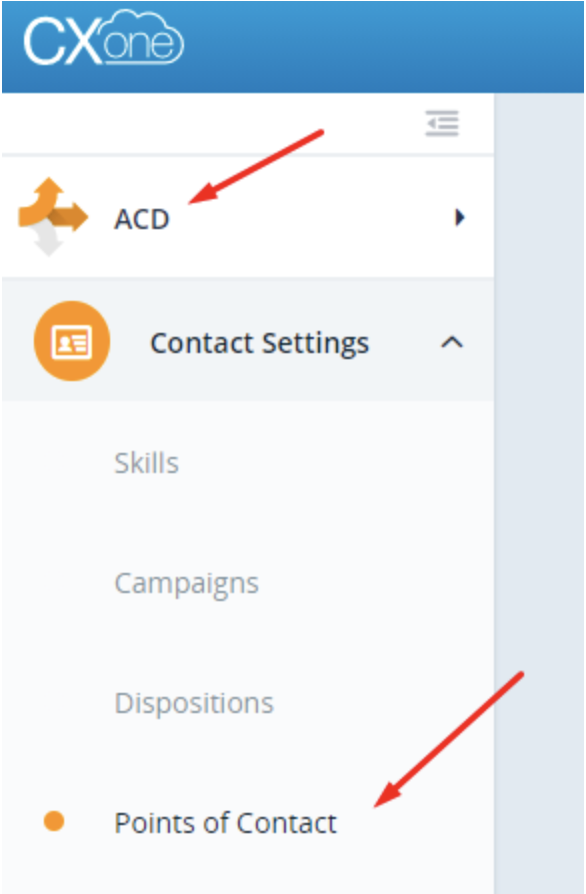
19. Choose the point of contact that you want to connect with a script. Click on it.
20. Click edit at the top right corner of the window, and add script to the point of contact.
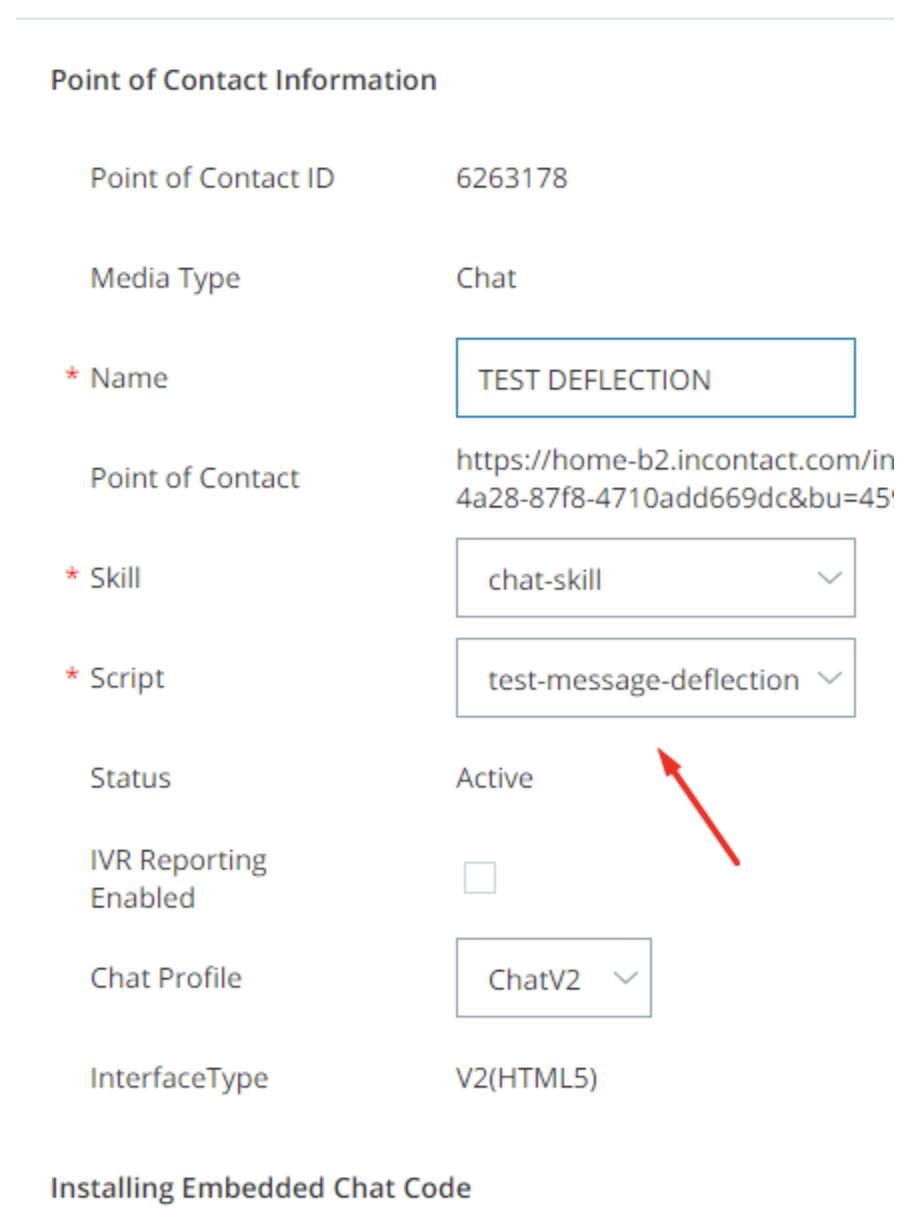
21. Click the save button.
Your minimal integration is done, please learn more in the Example section, how you can build the chat flow.
Your minimal integration is done, please learn more in the Example section, how you can build the chat flow.
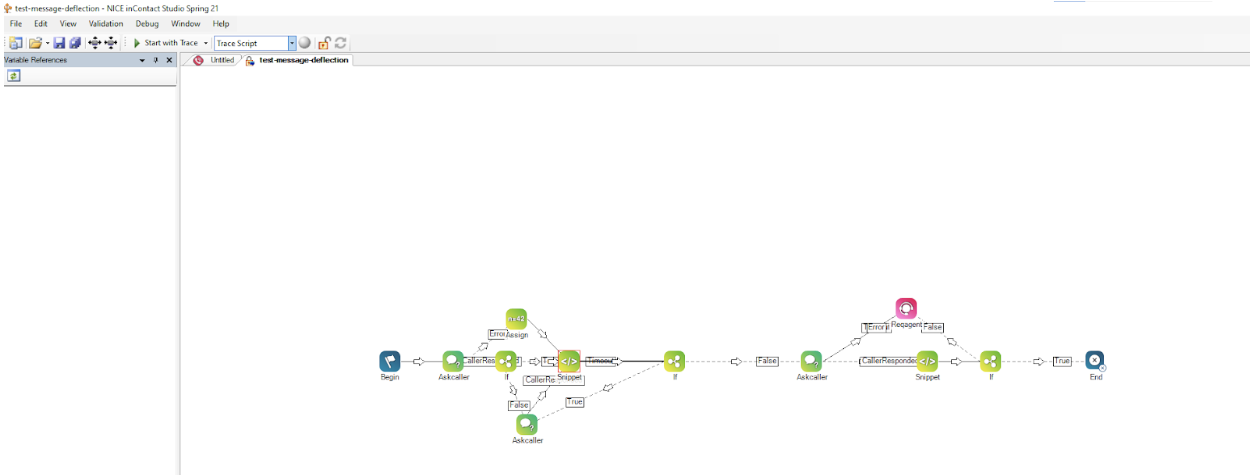
3 Example
Example implementation
To run import it with Studio App you would need to hit Ctrl+I keys combination in Studio App
To run import it with Studio App you would need to hit Ctrl+I keys combination in Studio App
It should upload this flow