
Shelf Knowledge Management System: Gem Edit and Draft Mode Overview Guide
Document version history
Version number | Modified by | Modifications made | Date modified | Status |
1.0 | Shelf | Initial release of the document. | 16 July 2024 | Expired |
1.1 | Shelf | The document has been updated to include the description and images of the Gem’s Preview feature. | 13 August 2024 | Active |
Introduction
- Enhanced Gem creation flow
- Enhanced Gem editing flow
- Saving Gems as drafts.
Prerequisites
- You have permissions to edit a Gem
- The Content Publication Workflow (CPW) feature is disabled for your account (Figure 1) or the CPW bypass is enabled for your account (Figure 2).
 Figure 1. Disabling CPW in Admin Panel > Customize
Figure 2. Enabling CPW Bypass for a user
Gem creation flow
- On the Shelf KMS Home Dashboard, find and click the ADD button in the upper part of the page.
- From the dropdown menu that opens, select the Create Content option.

Figure 3. Creating content in Shelf - Start
- In the next window that appears, select the needed content—Gem—type.
 Figure 4. Creating content in Shelf - Selecting content type
 You are next redirected to the standardized Edit Gem page as shown in the figure below.
 Figure 5. Creating content in Shelf - Working with the Edit Gem page
- Gem type icon - not editable
- Gem title - required, up to 255 characters
- Gem description - optional, up to 500 characters
- Gem’s Rich Text Editor - optional, allows you to enter and format text, add graphics etc.
- Gem location - required, the default location is (a) user’s Private library, if the user is on Home Dashboard, Gem page, or in this library, (b) any library where the user is at the moment of the Gem creation; if the Gem in Multiple Locations (GIML) capability is enabled for your account, multiple selection is possible, otherwise only one location can be selected at a time
- Gem language - required; if you create the Gem from Home Dashboard, than the Gem’s default language will be the language selected on Home Dashboard, and if you create the Gem from within a library, then the Gem’s default language is the language selected in that library’s search results
- Category - optional, single or multiple selection is supported depending on the account settings
- Tags - optional (if you have permissions to edit tags)
- Custom preview image - optional, editable, allows you to add any desired preview image for your Gem; JPG, GIF or PNG formats are allowed, with the recommended image size 400x400px and the file size not more than 1MB
- Template (if Templates are enabled for the account) - selectable, allows you to choose and apply a needed Gem template.
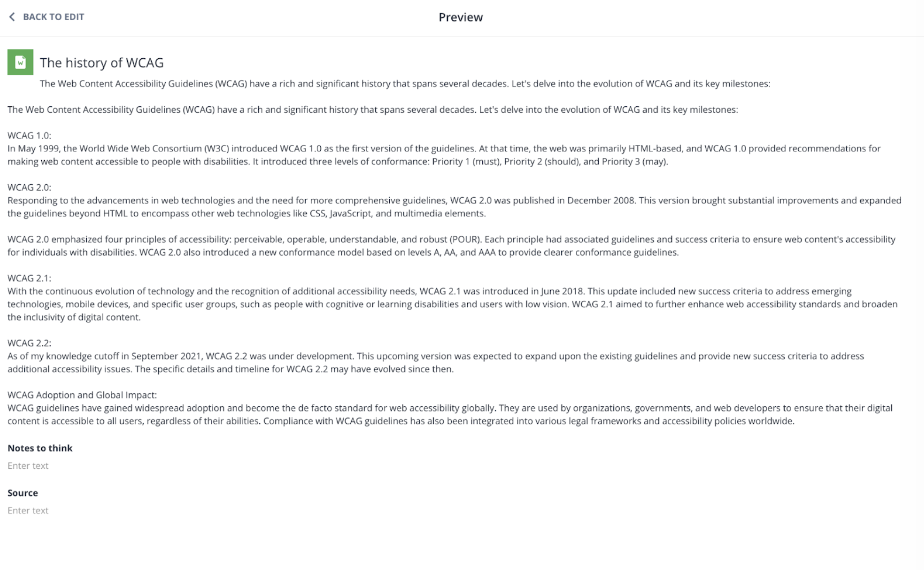
Figure 6. Previewing the Gem’s content
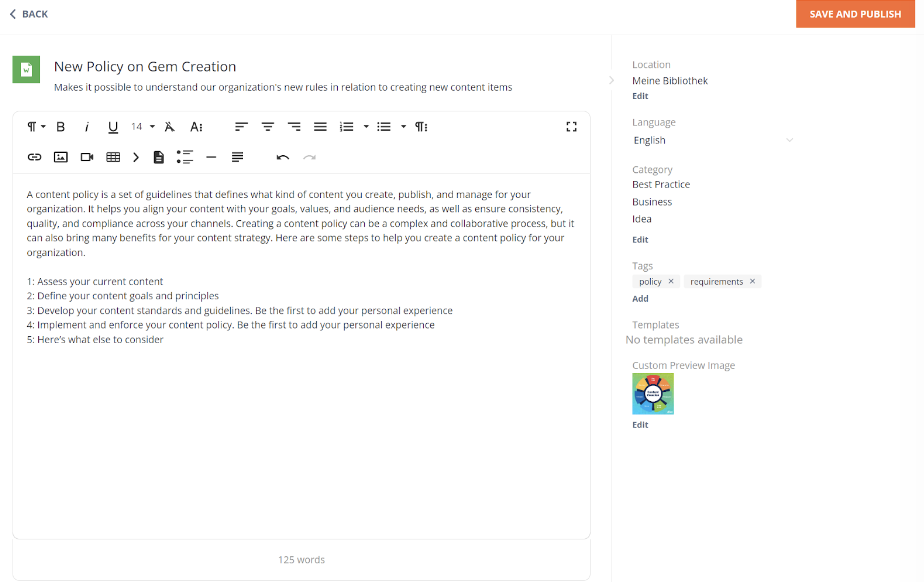
Figure 7. Creating content in Shelf - Saving and publishing the Gem
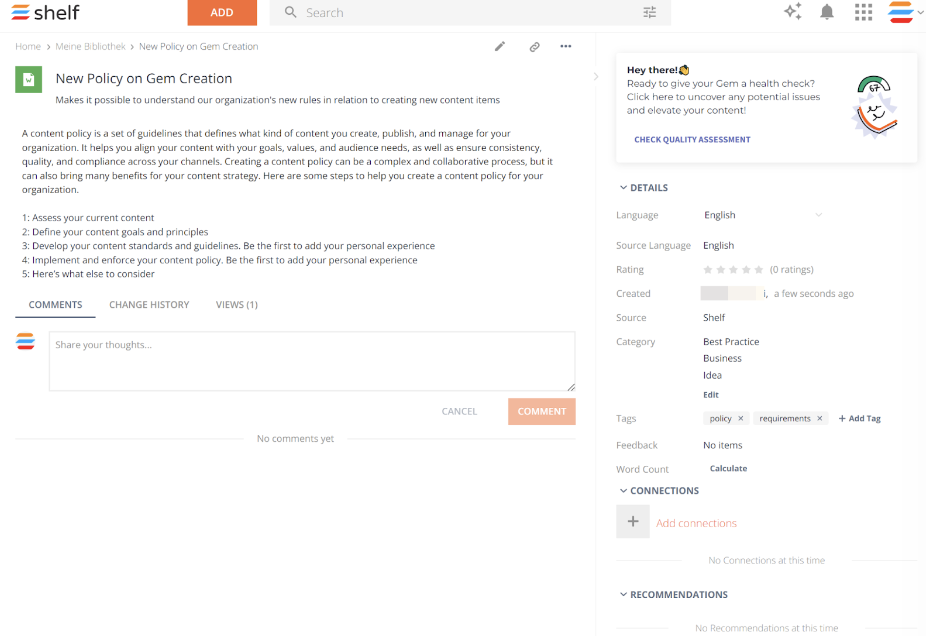 Figure 8. Creating content in Shelf - Viewing the created Gem
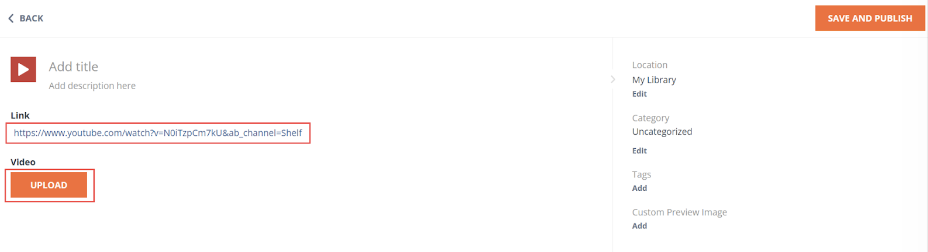
Figure 9. Creating a Video Gem
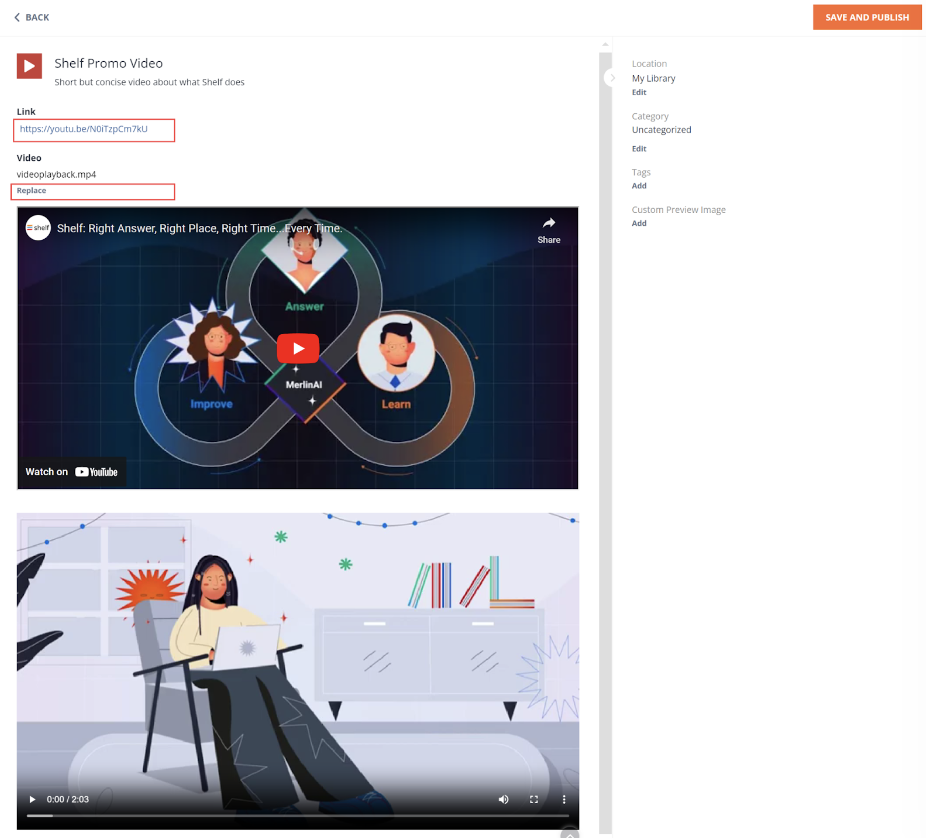
Figure 10. Creating a Video Gem - video uploaded
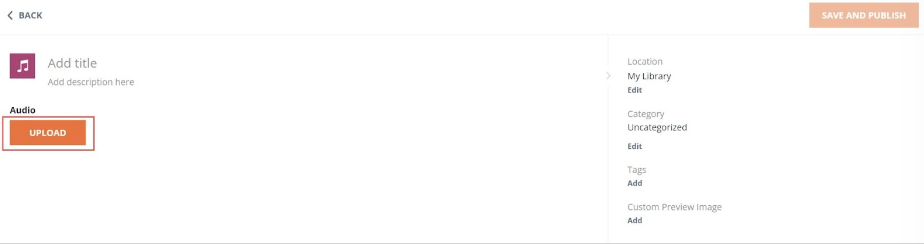 Figure 11. Creating an Audio Gem - uploading the audio
Figure 12. Creating a Document Gem - uploading the document
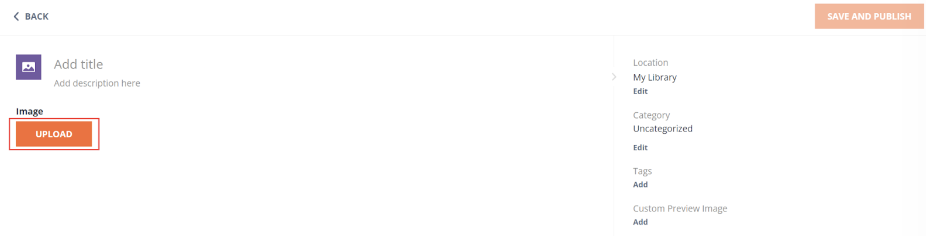
Figure 13. Creating an Image Gem - uploading the image
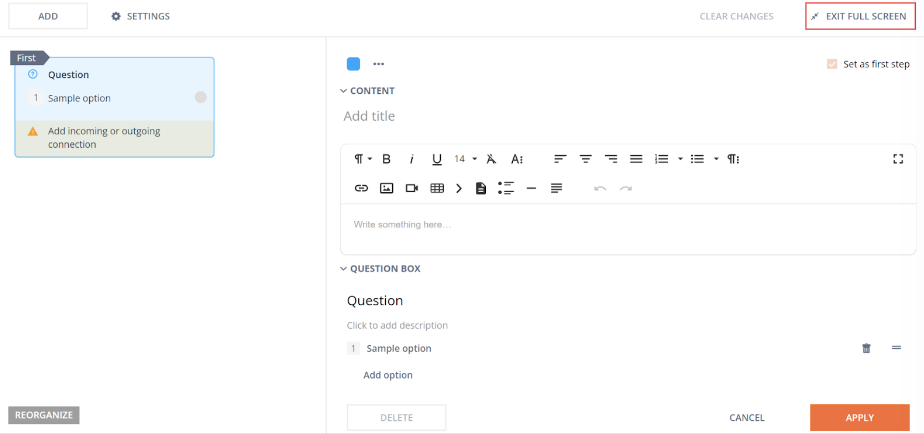
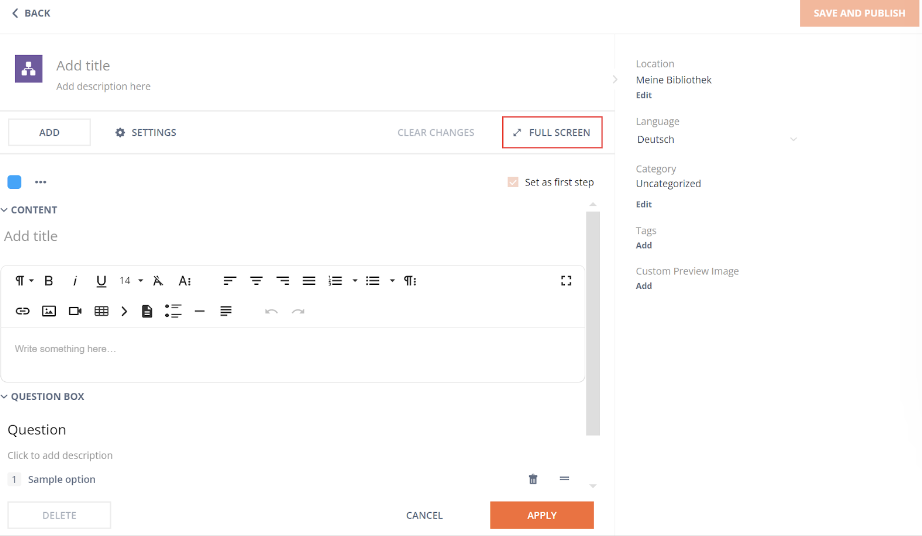 Figure 14. Creating content in Shelf - Creating Decision Tree Gems
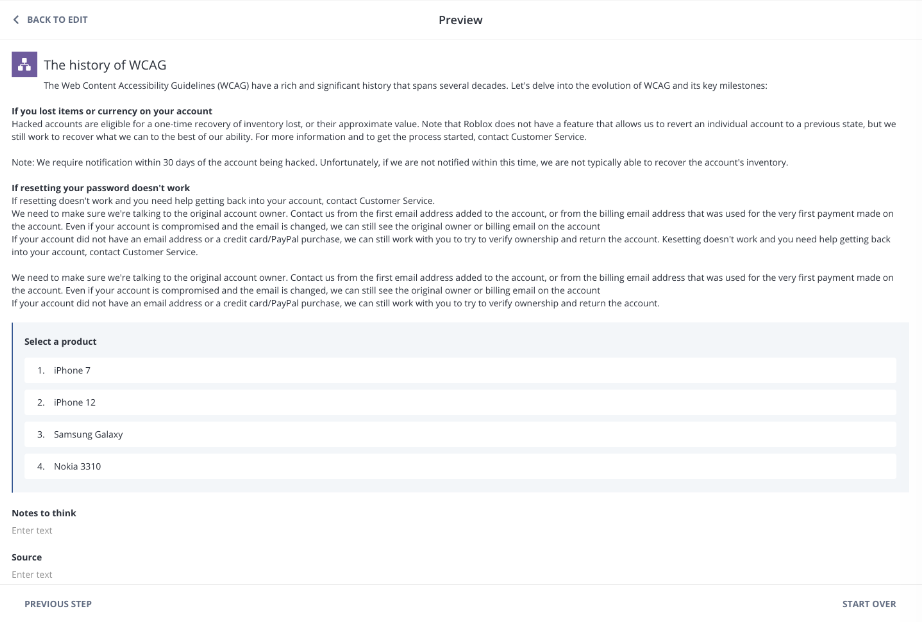
Figure 15. Previewing DT Gem’s content
Gem editing flow
- Once you have logged in to your Shelf KMS account and found the Gem you need to update, click it to open the Gem page shown in the figure below.

Figure 16. Visiting the Gem page in Shelf
- That is where the introduction of the new standardized Edit Gem page starts to be seen and changes your actions on the Gempage:
- You are NOT ABLE to edit the Gem content in place on the Gem page
- You can see Gem’s content and the Details, Optimization, Connections, Recommendations on the Gem page
- If you have permissions to edit Gems, you are able to update some of the Gem’s metadata directly on the Gem page: tags, categories, source language, rating, and owner. You can also autotranslate the Gem if needed and if the autotranslation capability is enabled. You can change the Gem’s source language here as well.
- New, more accurate and logical, context menu for the Gem page, where the content updating/editing options—Custom Preview Image and Manage Locations—have been removed for ALL types of Gems; for those types of Gems which operate attachments—Audio, Video, Image, Document types—the context menu now also does not allow changing the attachment: the Change attachment option is now part of the Edit Gem page.

Figure 17. Old context menu on View Gem page
If you want to edit the Gem itself, you need to enter the Gem editing mode. This approach was introduced to make your work with content more logical and more consistent: you will no longer enter the content editing mode by mistake if you have permissions to edit content (if your user role is Admin, Collaborator, or Member). Figure 18. New context menu on the Gem page
- If you have permissions to edit Gems, click the Edit icon as shown in Figure 16 above.
- Once clicked, you get to the Edit Gem page where you can work with Gem content and metadata.

Figure 19. Viewing the Edit Gem page after entering the content editing mode
- Gem type icon - not editable
- Gem title - required, up to 255 characters
- Gem description - optional, up to 500 characters
- Gem Rich Text Editor (RTE) - optional, Shelf’s Rich Text Editor set of tools which allows you to enter and format text, add graphics, links etc.
- Gem location - required, the default location is (a) user’s Private library, if the user is on Home Dashboard, Gem page, or in this library, (b) any library where the user is at the moment of the Gem editing; if the Gem in Multiple Locations (GIML) capability is enabled for your account, multiple selection is possible, otherwise only one location can be selected at a time
- Gem language - required; if you create the Gem from Home Dashboard, than the Gem’s default language will be the language selected on Home Dashboard, and if you create the Gem from within a library, then the Gem’s default language is the language selected in that library’s search results
- Category - optional, single or multiple selection is supported depending on the account settings
- Tags - optional (if you have permissions to edit tags)
- Custom preview image - optional, editable, allows you to add any desired preview image for your Gem; JPG, GIF or PNG formats are allowed, with the recommended image size 400x400px and the file size not more than 1MB.
- Gem metadata (except Tags, Category)
- Recommendations
- Connections
- Optimize Content section
- Comments tab
- Change History tab
- Views tab
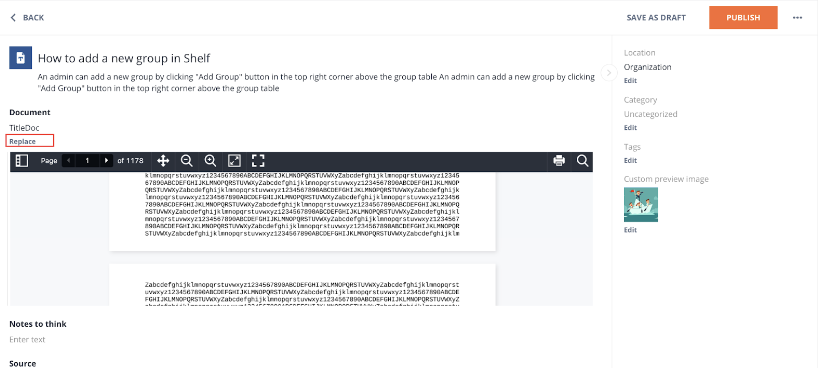
Figure 20. Editing the Document type Gem - replacing the document by uploading
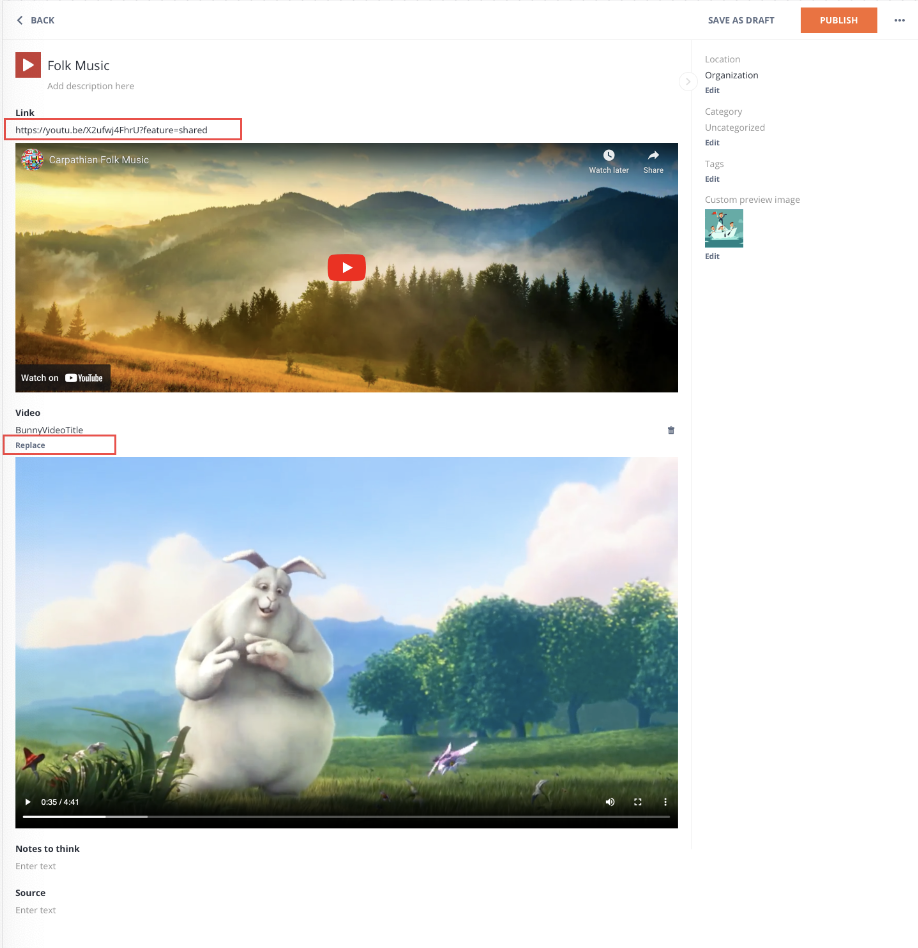
Figure 21. Editing the Video type Gem - replacing the video by link and by uploading

Figure 22. Viewing Gem actions on the Edit Gem page
- The Gem is published with all the changes you have made to its content and you are redirected to the Gem page where you can immediately check the changes
- The changes you have made to the Gem can be viewed in the Gem Change History tab of the Gem page.
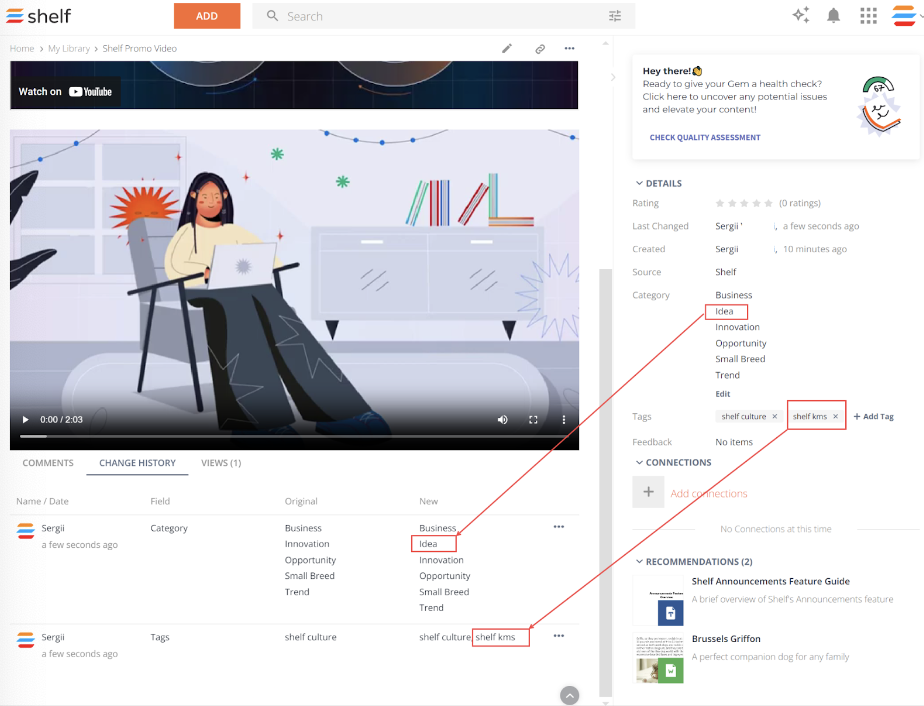 Figure 23. Viewing the changes published and merged into Gem
- The confirmation modal window pops up where you can either discard changes and go back to the Gem page by clicking YES or click NO to go back to the Edit Gem page and continue updating your Gem

Figure 24. Confirming the Back action from the Edit Gem page
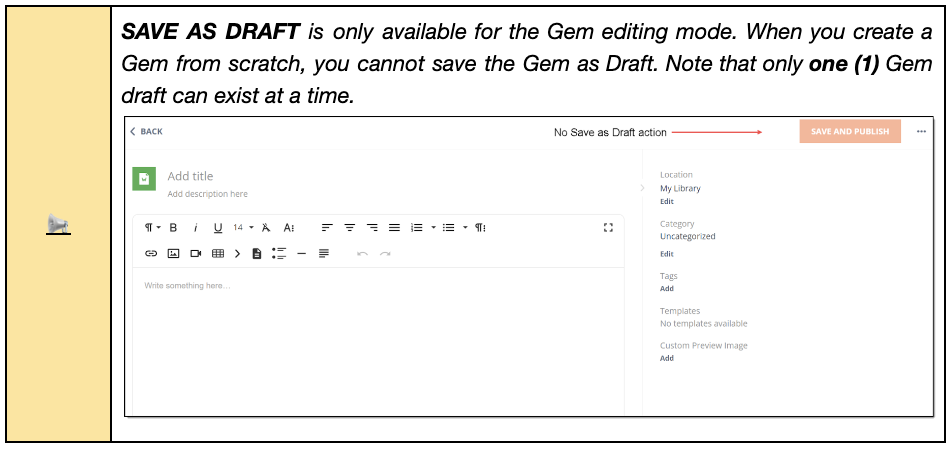
Saving Gem as Draft
Understanding Gem Draft feature and its purpose
- Open the Edit mode for the needed Gem.
- On the Edit Gem page that appears, you want to update the Gem by adding its Custom Preview Image, that is the image to be displayed on the Shelf Home Dashboard instead of the generic preview image. Find the relevant section in the Gem Details panel and click the Add button. Upload the needed image in the popup modal window and click Save.

Figure 25. Adding the custom preview image for the Gem
- The image is added and is shown in the respective section of the Gem Details panel.
 Figure 26. Viewing the added custom preview image
 - Now you need to save the Gem as Draft because you don’t want anybody to see it until other updates are made.
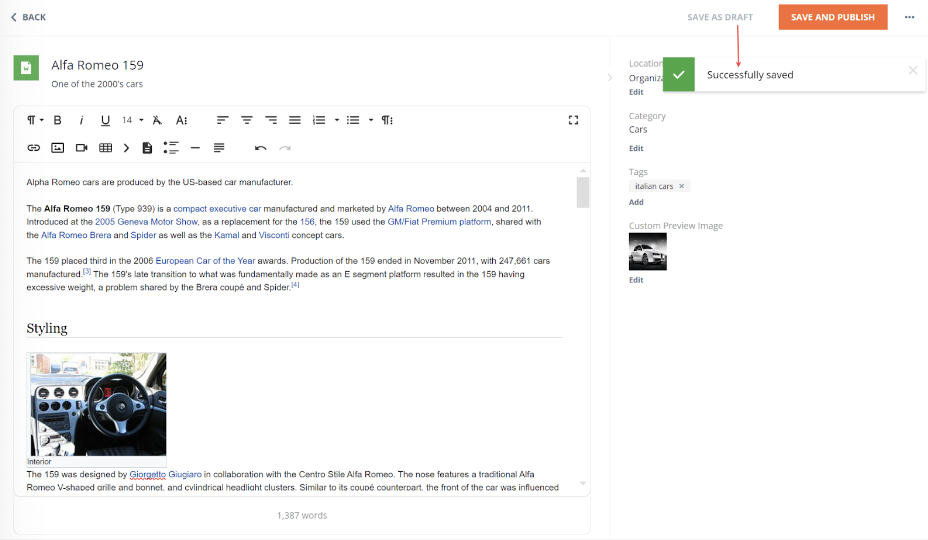
Figure 27. Saving Gem as draft
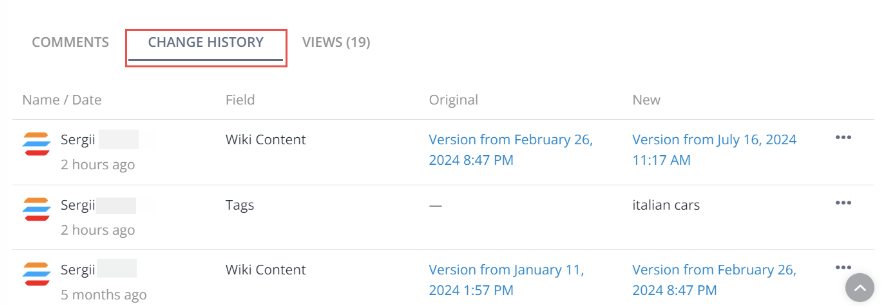
Figure 28. Viewing the Gem Change History tab on the Gem page
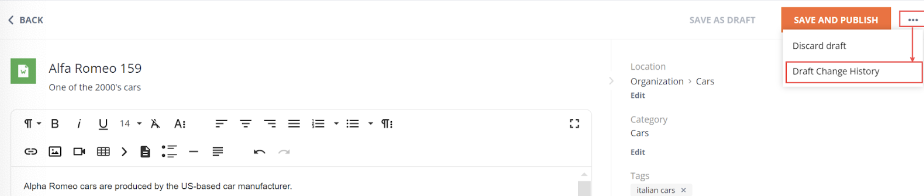
Figure 29. Accessing the Draft Change History page
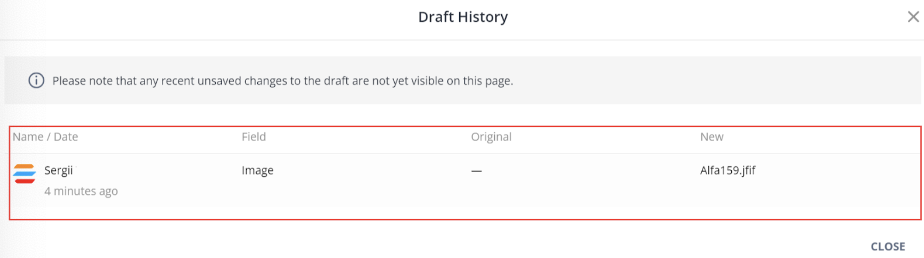 Figure 30. Viewing the Draft Change History page and updates saved to Gem Draft
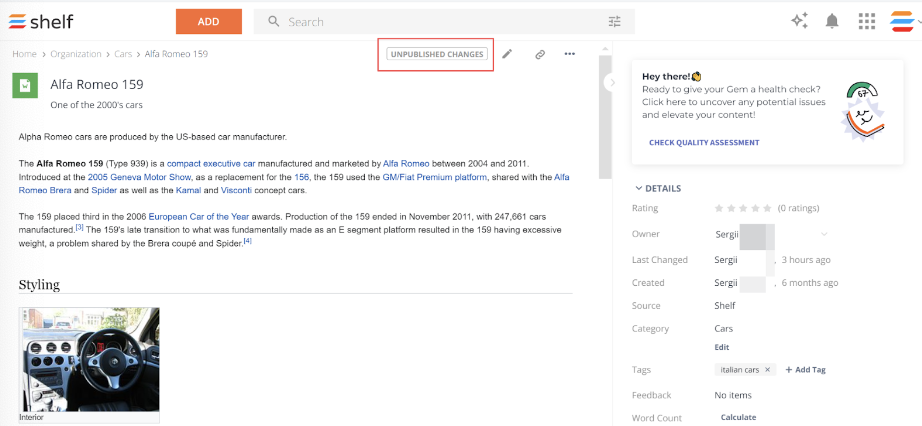 Figure 31. Viewing the Unpublished Changes label on the Gem
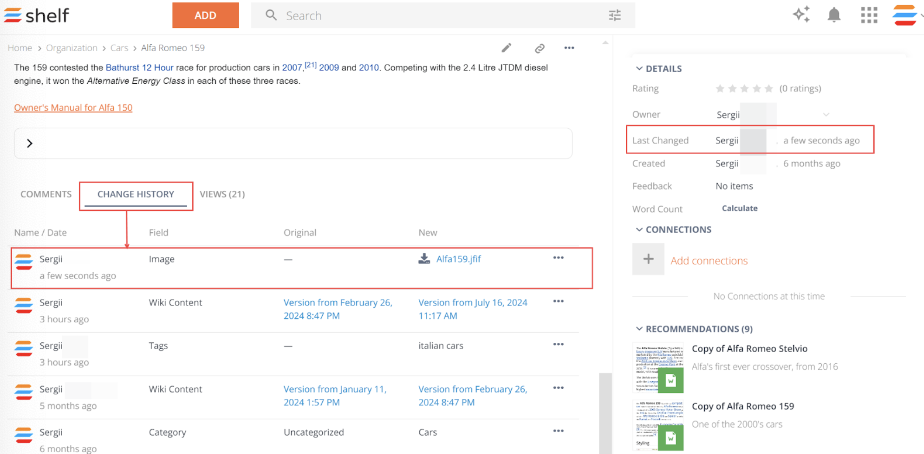 Figure 32. Viewing the published changes in the Change History tab
Viewing Draft Change History
- Change History is enabled in the Admin Panel > Customize > Gem tab
- You must have permissions to edit the specific Gem
- The Gem’s content has been modified (updated) and saved at least once, that is the Gem has been updated and saved as draft at least once
- You are on the Edit Gem page.
 Figure 33. Accessing and viewing the Draft Change History page with various draft changes
 - Informational message: Please note that any recent unsaved changes to the draft are not yet visible on this page
- Name of the draft change author and time of the change
- Field: shows what field was affected by the draft change
- Title (all Gem types)
- Description (all Gem types)
- Attachment (Audio, Document, Image, Video types of Gems)
- [CUSTOM_FIELD_NAME] - custom field (all Gem types, if custom fields are added)
- Decision Tree (Decision Tree type)
- Settings (Decision Tree type)
- Question (FAQ type)
- Answer (FAQ type)
- Link (Link, Organization types)
- Wiki Content (Wiki, Organization, Person, Post types)
- Tags (all Gem types)
- Category (all Gem types)
- Image (custom preview image, all Gem types)
- Original and New: shows the affected field values before and after the change
- If the change affected the Attachment or Image field, not-clickable filename is shown
- If the change affected the Decision Tree, Answer or Wiki Content field, not-clickable text reading Version from DDMMYYYY:HHMM (in format February 19, 2024 8:14 PM) is shown
- If any other field is affected, the value is displayed
- If there are no values for the Original or New field, then you will see “-” in the Draft Change History grid.
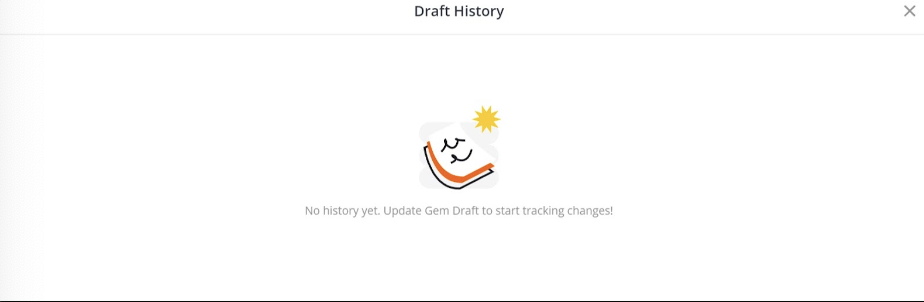
Figure 34. Viewing Draft Change History after publishing all changes

Discarding Gem drafts
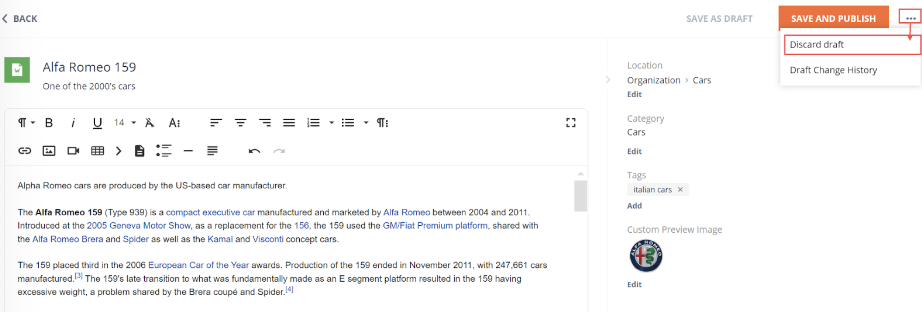
Figure 35. Accessing the draft discarding option
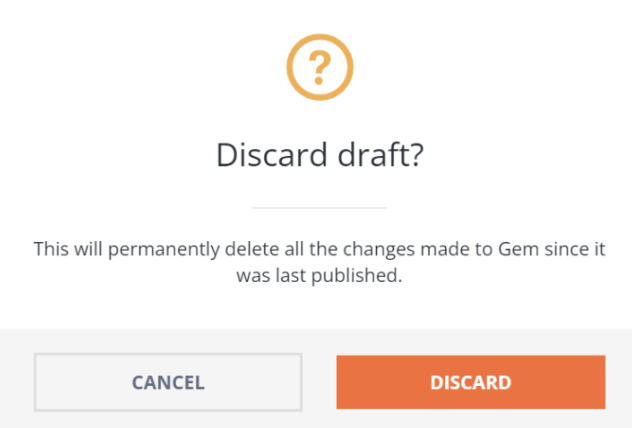
Figure 36. Confirming the Discard draft action
 Figure 37. Viewing the Draft Change History page after discarding the Gem drafts