Document Version History
Version number | Modified by | Modifications made | Date modified | Status |
1.0 | Shelf | Initial release of the document. | 1 November 2022 | Expired |
1.1 | Shelf | The document underwent a complete overhaul to reflect changes in the Shelf integration for Zendesk; imagery and text were updated to meet the changes. | 25 November 2022 | Active |
Document Purpose
This document has been developed to describe steps needed to set up and configure Shelf Integrations with Zendesk. The main audience of this document is those employees of Shelf’s customers who have the Admin level of permissions both in Shelf Knowledge Management Platform and in Zendesk.
If you require further assistance, please do not hesitate to contact us at support@shelf.io or from the in-app chat support within the Shelf platform.
Prerequisites
In order to be able to install Shelf integrations, Shelf Support needs to be contacted to provide you with a zip-formatted app archive to be uploaded to Zendesk.
Additionally, for starting to use the Answer Assist feature, Shelf Support needs to be contacted to configure your account.
Standalone Shelf App for Zendesk Support
- Check and follow the Zendesk guidelines in order to get familiar with uploading a private app to Zendesk.
- Go to Admin -> Apps and integrations -> Zendesk Support apps

- Click the Upload private app button (3) as shown in the figure above.
- Use the app shelf_nav_bar_app.zip (the zipped package you receive from Shelf Support) and select it in the App File option. Click the Upload button next.

- In the next window, agree to the Zendesk Terms and Conditions by clicking the Upload button again.

- Click the Install button on the next page.

- Enjoy Shelf from the left sidebar

Shelf Answer Assist for Zendesk Support Tickets
- Perform the steps from the chapter above, but use shelf_ticket_sidebar_app.zip during upload.
- By default, Answer Assist uses the first configuration in order on your account, but you can optionally pass a configuration ID from Answer Assist Configurator’ to specify the one you need.


- You can now use Answer Assist in the right sidebar of your ticket UI.

Shelf Answer Assist for Zendesk Chat
- Follow instructions on how to upload a private app on Zendesk Chat
- Open Chat -> Settings -> Account -> Apps.

- Use the app shelf_chat_sidebar_app.zip and select it in the App File option.

- Click the Upload button again and then hit Install.
Answer Assist configuration ID is described in step 2 of the Shelf Answer Assist for Zendesk Support Tickets chapter.
- Open an interaction and find the Answer Assist widget in the right part of the window.

Configuring Answer Assist and Content Mappings
Configuring Custom Fields in Zendesk Tickets
To do that, perform the following steps:
- Go to Zendesk Admin Center, find the Objects and rules menu in the sidebar panel and select the Fields option there.
In the Field ID column, there is an ID of the field that will be used in further configuration.
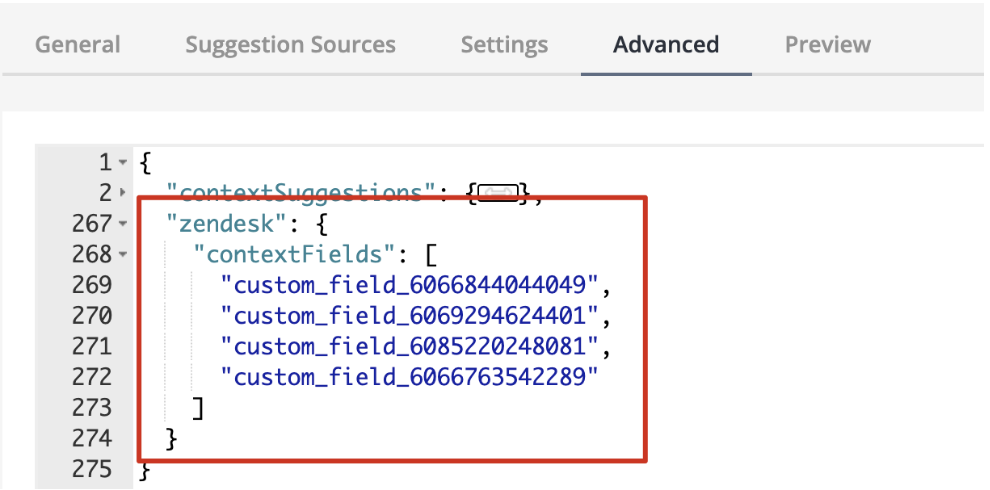
- In the Advanced tab of your Answer Assist configuration in the Answer Assist Configurator in Shelf KMS, create a Zendesk object with a contextFields object inside, and insert an array of field IDs in the form of custom_field_<field_id>. This will allow you to understand what fields should be mapped to suggestions.
❗Note:
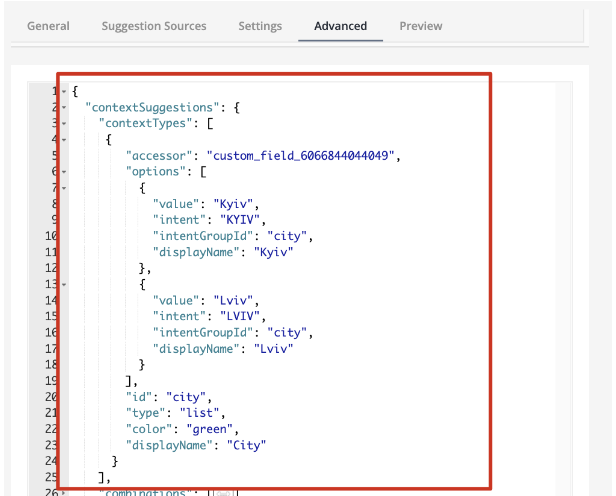
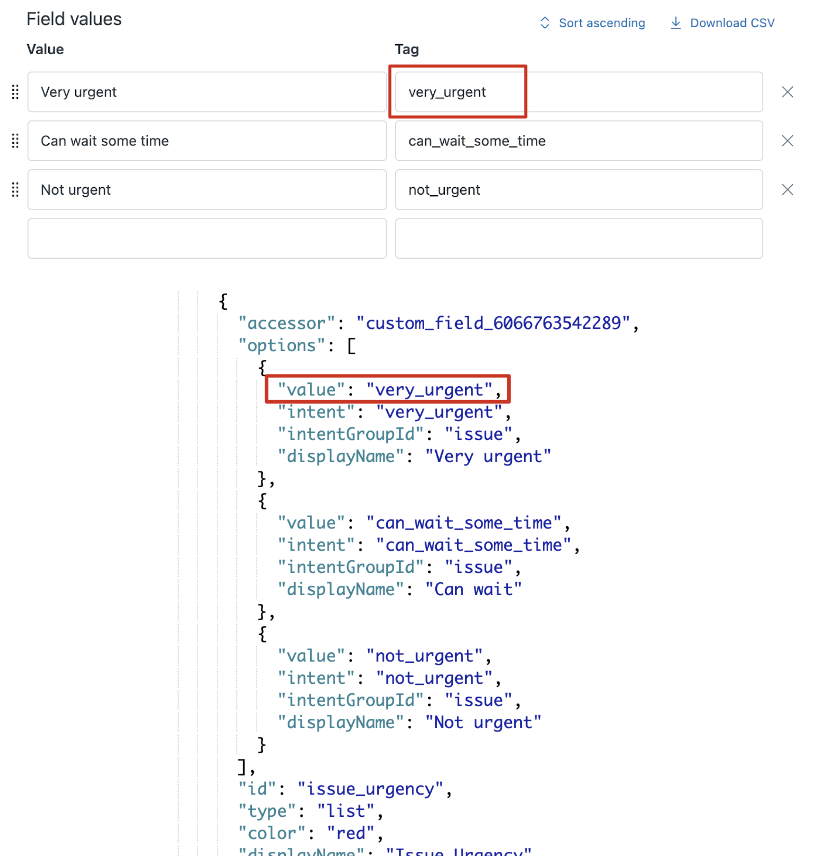
 3. Add the needed options for the selected custom fields in contextSuggestions → contextTypes