
Purpose
This document describes the steps necessary to set up and configure Shelf Integrations with SAP C4C.
If you require further assistance, please do not hesitate to contact us at support@shelf.io, via the live chat on the Shelf website, or from the in-app chat support within the Shelf platform.
Last Update: Sep 14, 2022
Mashup creation
To display Shelf widgets there should be two mashups: one for the Shelf App and another one for the Answer Assist widget.
Mashup for Shelf App
Navigate to Administrator → Mashup Authoring → New mashup → HTML Mashup
In the new window fill in the name of the mashup and mashup category, and choose “Without Port Binding”. In the type checkbox section select “URL” and paste Shelf App URL format - https://<account_subdomain>.<shelf_domain>/ (example https://google.shelf.io, https://google.shelf-eu.com etc).
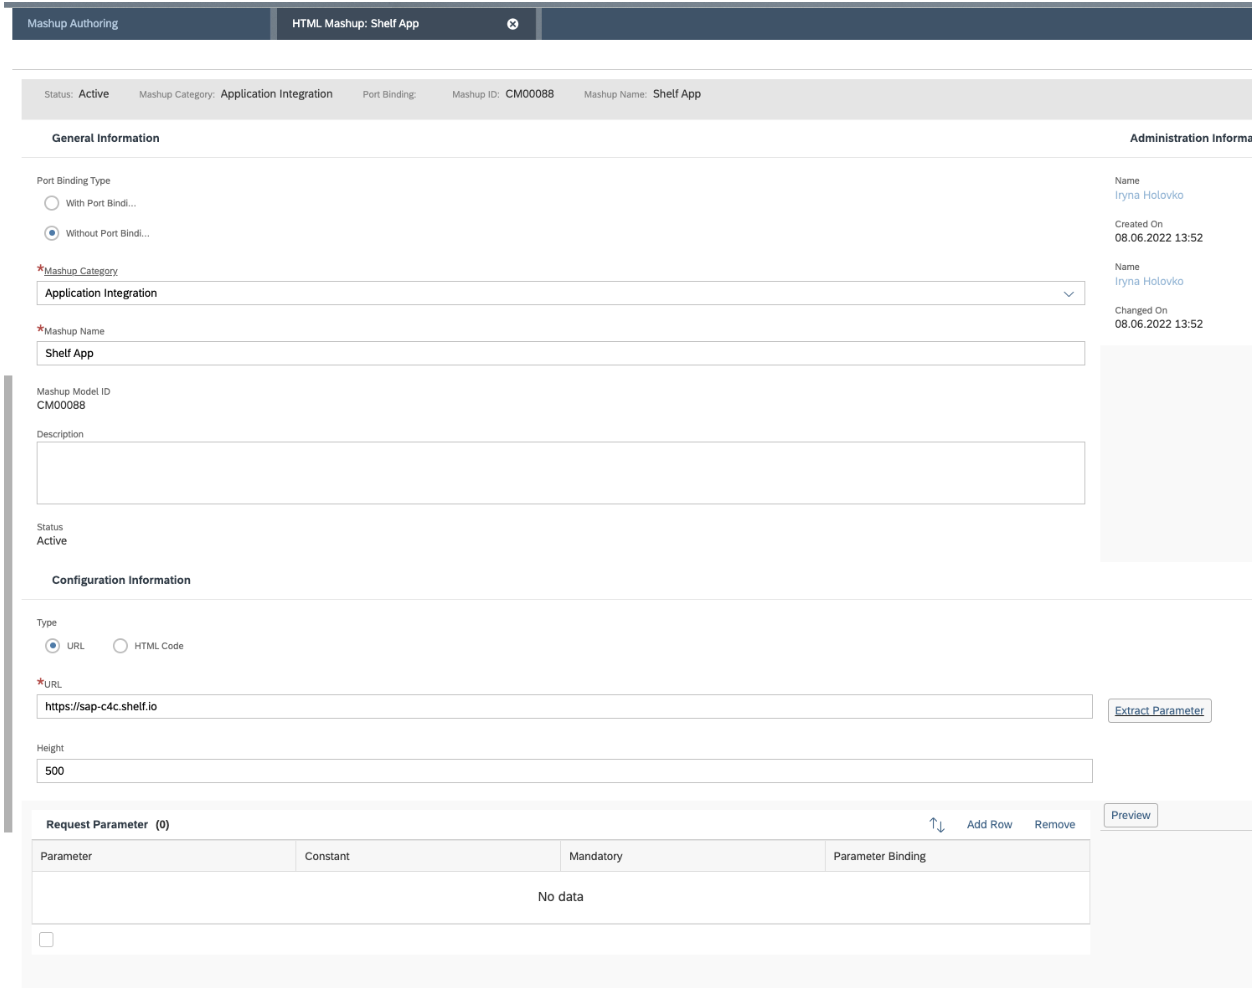
Click Save and close the mashup.
Mashup for Shelf Answer Assist
Navigate to Administrator → Mashup Authoring → New mashup → HTML Mashup
In the new window fill in the name of the mashup and mashup category, and choose “With Port Binding”.  Under the Type choose URL and paste https://sap-c4c.<shelf_domain>/agent-assist/ as Answer Assist integration. For example, https://sap-c4c.shelf.io/agent-assist/, https://sap-c4c.shelf-eu.com/agent-assist/, etc
In the Port Binding field choose Ticket Information and click “OK”
Request Parameter table items:
Parameter | Constant | Parameter Binding |
|---|---|---|
ticketId | TicketID | |
ticketDescription | TicketDescription | |
configurationId | <answer-assist-configuration-id> |

Press Save and close mashup.
Shelf App as Work Center View
For this view Mashup for Shelf App will be used (created in the previous steps).
A guide to installing Shelf App Mashup as a Work Center View - https://blogs.sap.com/2021/12/08/understanding-mashups-in-sap-cloud-for-customer-from-beginner-to-embedder/#displaying-a-mashup
The result will look like this
Answer Assist widget on the Interactions tab
For the Interactions tab Mashup for Shelf Answer Assist will be used.
Navigate to the Tickets menu. Click on your avatar and select “Start Adaptation” 
To be able to add HTML Mashup, go back to the level with Pane, click Add button → Mashup → Choose created Mashup (Mashup can be used only once, the same Mashup is not allowed to be placed in different places) 
Layout Type should be “Full Width with Two Column” to be able to place mashup next to the interactions widget.
When mashup placing is finished press on your avatar again and select “End Adaptation”.
Enabling suggestions for Answer Assist
For Answer Assist to provide suggestions based on the Ticket’s subject and conversation content it is required to have the correct Answer Assist configuration. You will need to adjust it in the Shelf Admin panel.
First, navigate to your Shelf Admin Panel web page and select the “Answer Assist Configurator” tab.

Then on the “Answer Assist Configurator” web page select the configurations you would like to use in SAP C4C, or create one.
![]()
After selecting a specific Answer Assist configuration web page click on its “Advanced” tab:

In the displayed input field You need to add settings in JSON format that will allow Answer Assist to provide suggestions. Here is an example snippet tailored to one of the test environments. You’d need to adjust it for every environment where Answer Assist will be deployed.
"sap-c4c": {
"proxy": {
"authorization": {
"login": "YOUR_LOGIN",
"password": "YOUR_PASSWORD",
"type": "Basic"},
"template": {
"ticketId": "[TICKET_ID]"},
"responseMappings": {
"type": "C_Z9b72e60050aa6f66",
"text": "C_Z27d89b5d6fd67360"},
"method": "get",
"templateUrl": "https://my338669.crm.ondemand.com/sap/c4c/odata/analytics/ds/Zae08b8ed37de57eaf96fc7.svc/Zae08b8ed37de57eaf96fc7?$select=C_Zcc25c8205fd3533f,C_Z27d89b5d6fd67360,C_Za5f5527673894e3c,C_Z9b72e60050aa6f66&$filter=(C_Zcc25c8205fd3533f%20eq%20'[TICKET_ID]')&$format=json"}}}
login: Specify login for the accessing data from template URL
password: Specify password for the accessing data from template URL
templateURL: Change accordingly to the production URL, replace actual ticket ID with template field name TICKET_ID
Response mappings:
Add mapping between fields, type - states for the message type(INBOUND)
text - field wich contain actual text of the message
After advanced settings have been added, click the “SAVE” button

Once saved, the “authorization” with credentials is redacted and replaced with “*****” for security reasons.
To verify that everything is correct navigate to SAP C4C > Service > Tickets > “Any Ticket” > Interactions (or any tab where the Shelf Answer Assist widget is placed). Then in the Answer Assist widget click on the Assist tab and wait for suggestions to load.
