
This document describes the required steps to configure Shelf in CXone.
The following configuration options are described in this document:
- Custom Workspace
- IVR Integration
In case you require assistance, please don’t hesitate to contact us at support@shelf.io or via the Live Chat on our Website or inside of the Shelf App.
Last updated: 27-February 2020
Create Shelf Workspace
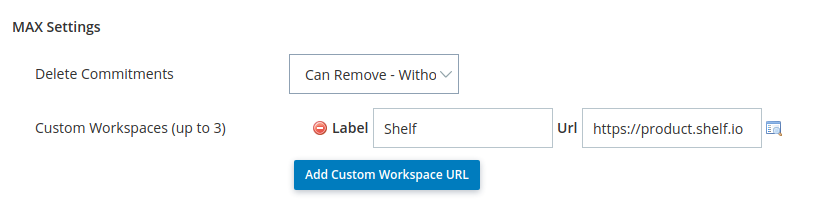
By integrating Shelf as custom workspace into CXone, you can eliminate the need to open a separate browser tab for Shelf. Once integrated as a custom workspace, Shelf displays automatically when the MAX agent is launched.
The following steps are needed to set up Shelf as a Custom Workspace,


Integrate Shelf into the IVR
The CXone IVR integration with Shelf requires two configurations:
- Creation of an IVR to Content Mapping
- Configuration of the self-service script in the CXone Studio App
IVR to Content Mapping
The IVR to Content Mapping supports two ways to map a specific IVR outcome to the content to be displayed by Shelf:
- A specific Gem, such as a help article or guided workflow
- A set of results from which the agent can choose from
To add mappings to your Shelf account, you can enter the specific items into the UI or create an Excel spreadsheet with the following columns:
Column | Value |
|---|---|
ivrCode | caller’s selection or intent (e.g. 2-5-1) |
ivrSystemId | identifier for a specific IVR system or support line |
mappingValue | Shelf URL for content to be displayed |
mappingType | GEM = specific content, such as article or guided workflow SEARCH = set of results |
For more details, please refer to the Shelf IVR Mapping Guidance and Worksheet.
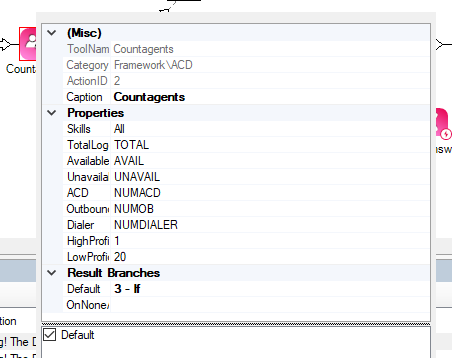
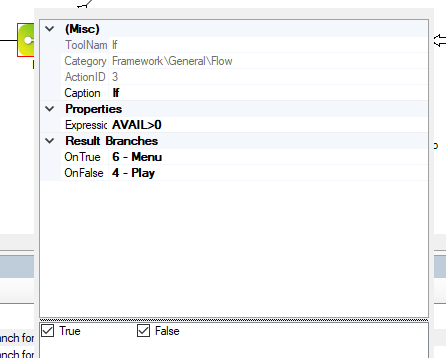
Configuration in Studio App
Shelf can be integrated with CXone IVR using the Studio App. You can learn more about the Studio App in the Contact Center Tools section of NICE inContact’s Help website: https://help.incontact.com/fall19/EN/Content/Studio/StudioOverview.htm
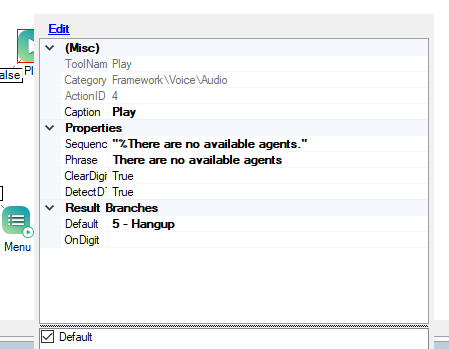
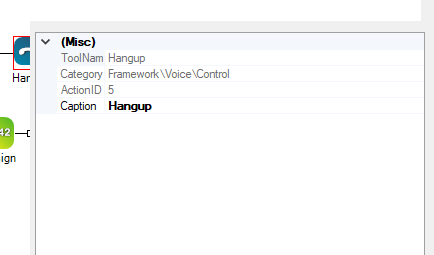
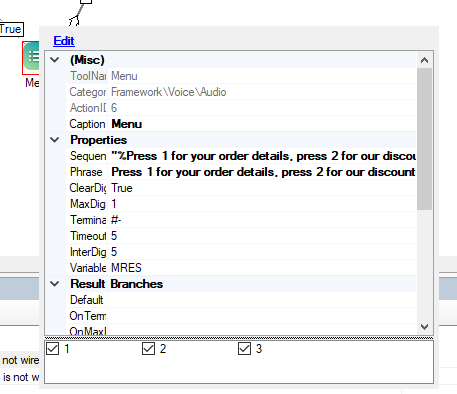
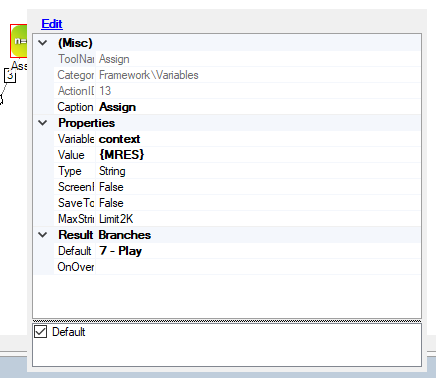
With Shelf being integrated with the CXone IVR, on call transfer Shelf displays relevant content to the agent immediately. For this, an OpenURL action type is added to the Runapp step of the Studio script.


The Action Value needs to be set to the Shelf IVR URL. This URL includes the Shelf Account Id, the specific IVR system as well as the selected IVR code:
https://ivr.shelf.io/{{Account id}}/{{IVR System ID}}/{{IVR code}
The Shelf Account Id is a value provided by Shelf and is unique to your account. The IVR System Id typically don’t change for a specific Studio script and can be hardcoded. This value can be defined by you, for example, to correspond with a specific customer support line. The IVR code is dynamic based on the selections the caller made. By default, the value {MRES} represents such a selection ( MRES = menu response).
For more details, please refer to the Shelf IVR Mapping Guidance and Worksheet.
Integrate Shelf into the IVR (context-mapped suggestions version)
- Creation of Content Mappings on Admin Panel + Advanced configuration of Answer Assist
- Configuration of the self-service script in the CXone Studio App
Configuration in Studio App
Shelf can be integrated with CXone IVR using the Studio App. You can learn more about the Studio App in the Contact Center Tools section of NICE inContact’s Help website: https://help.incontact.com/fall19/EN/Content/Studio/StudioOverview.htm
With Shelf being integrated with the CXone IVR, on call transfer Shelf displays relevant content to the agent immediately. For this, an OpenURL action type is added to the Runapp step of the Studio script.
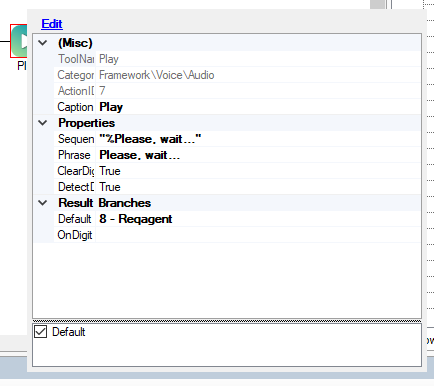
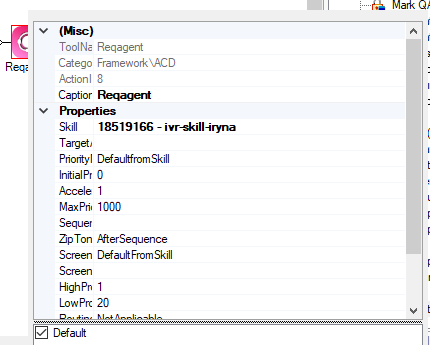
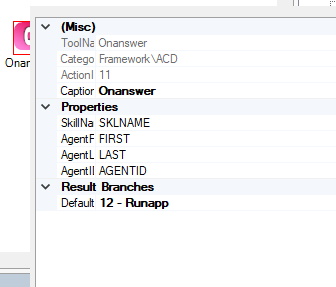
Example of a script:
General overview


 303077
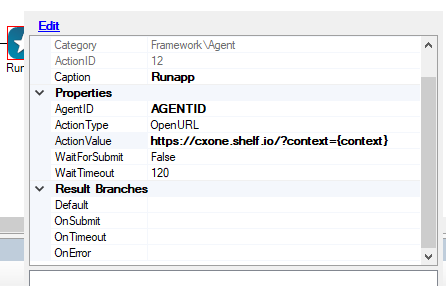
Configuring Answer Assist and Content Mappings
Once you have performed all the configurations mentioned in the above sections, you need to complete the configurations of Answer Assist and content mappings on the Shelf side. To learn more about the content mappings, their configurations, as well as about other Answer Assist’s advanced settings, refer to the following chapters of the Shelf Answer Assist End-to-End Guide: Content and Context in Answer Assist, Creating and Deleting the Answer Assist Configuration, and Configuring the Advanced Settings.