
Shelf API Token Feature Introductory Guide
Introduction
This introductory guide is aimed to provide you with concise data and overview of the API Token Feature of the Shelf Platform. This feature is a critical element of Shelf’s integrations with external systems and applications, therefore, make sure to read the document and keep it for further reference.
What is API Token
API tokens allow a user to authenticate with cloud apps and bypass two-step verification and SSO, as well as retrieve data from the instance through REST APIs. Token controls allow admins to view and revoke the use of API tokens by their managed accounts.
The API Token Feature in Shelf enables its users to avoid multifactor authentication when accessing Shelf products integrated on external platforms or solutions. It also simplifies the very integration of the Shelf products with external solutions.
Prerequisites
There is only one prerequisite for accessing and managing the API Token Feature on Shelf, and it is that you need to have the administrative permissions for your account.
Accessing the API Token feature
In order to access Shelf’s API Token Feature, log in to your admin account on Shelf and navigate to the Admin Panel. For this purpose, open the popup menu by clicking on the drawer icon in the left sidebar navigation panel, and select the Admin Panel option from the list.
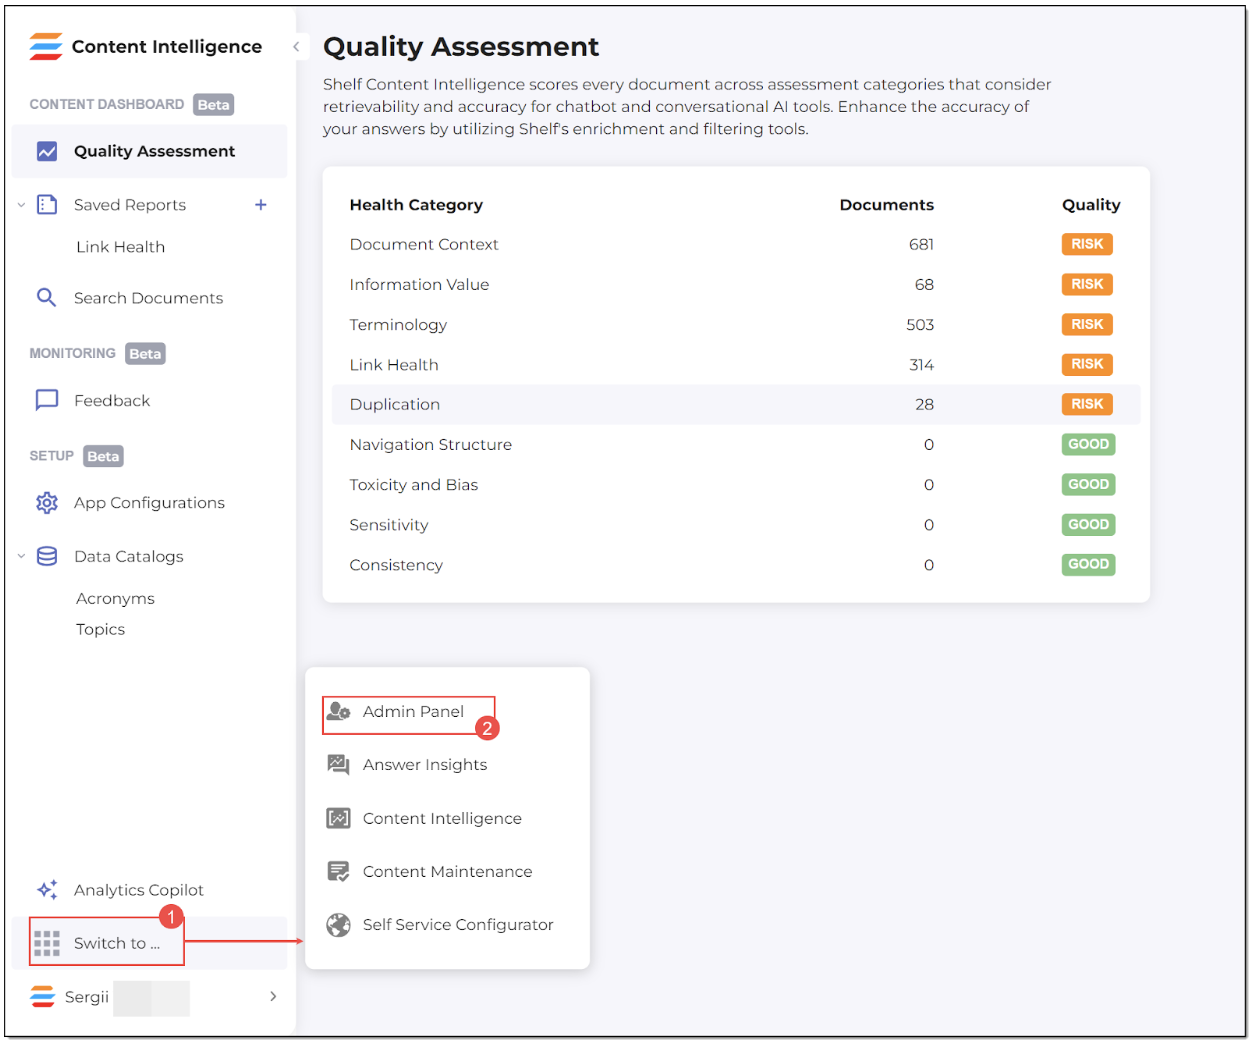 Figure 1. Accessing the Admin Panel on Shelf
In the Admin Panel that appears in the left part of the window, find and select the API Tokens option as shown in the figure below.
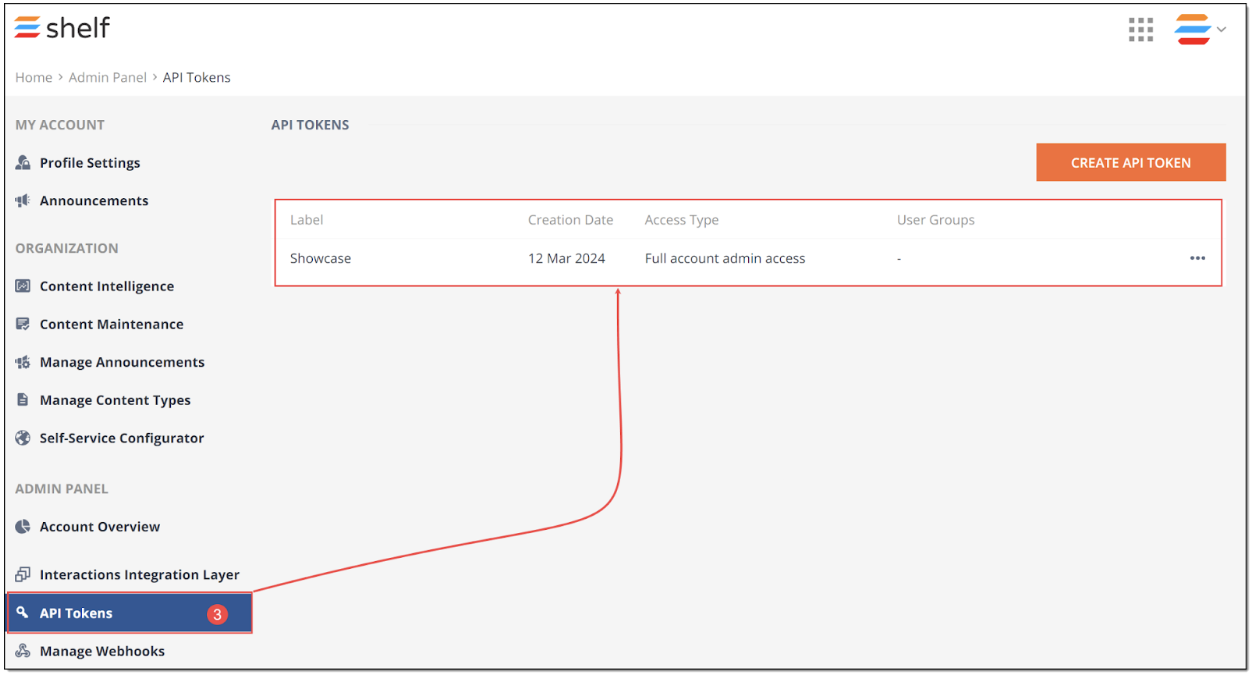 Figure 2. Accessing the API Token Feature
On the page that appears, you can see the existing API tokens that you have previously created, their label, creation dates, type of access authorized by these tokens, and also names of user groups they are issued to. From this page, you are able to create or revoke API tokens. Revoking an API token means that this token can no longer be used as the authorization it provides for users to access Shelf resources has been canceled.
Creating API token
Before creating an API token, it needs to be noted that Shelf now supports 50 (fifty) API tokens maximum.
In order to create a new API token for a needed group of your users, click the CREATE API TOKEN button.
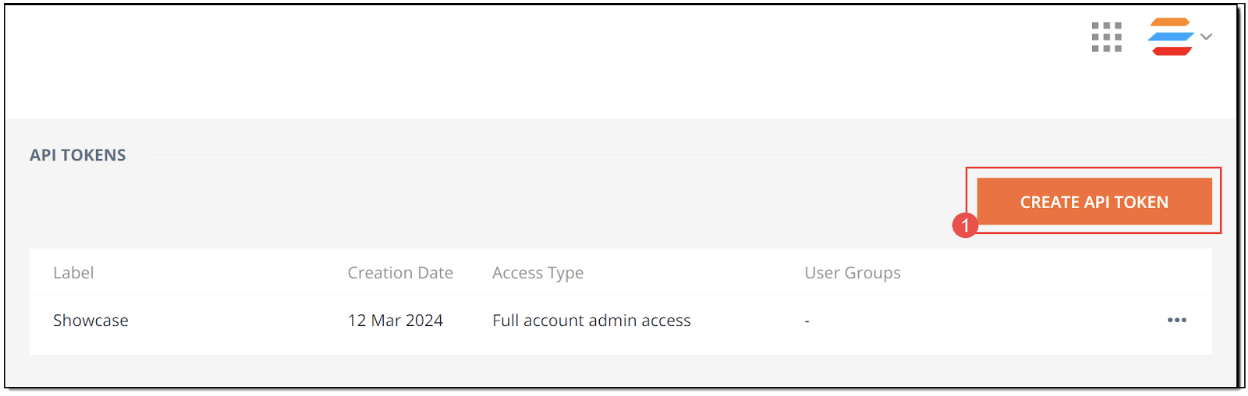 Figure 3. Starting API token creation
In the windows that appears next, populate the needed Label field (it is basically the name of your new API token), and select the level of access (Standard access or Full account admin access) the token provides, as well as indicate the user group for which this token is created. You can also indicate whether the token you create would allow for the external access to Shelf’s Content Intelligence API. Once done, click the CREATE button.
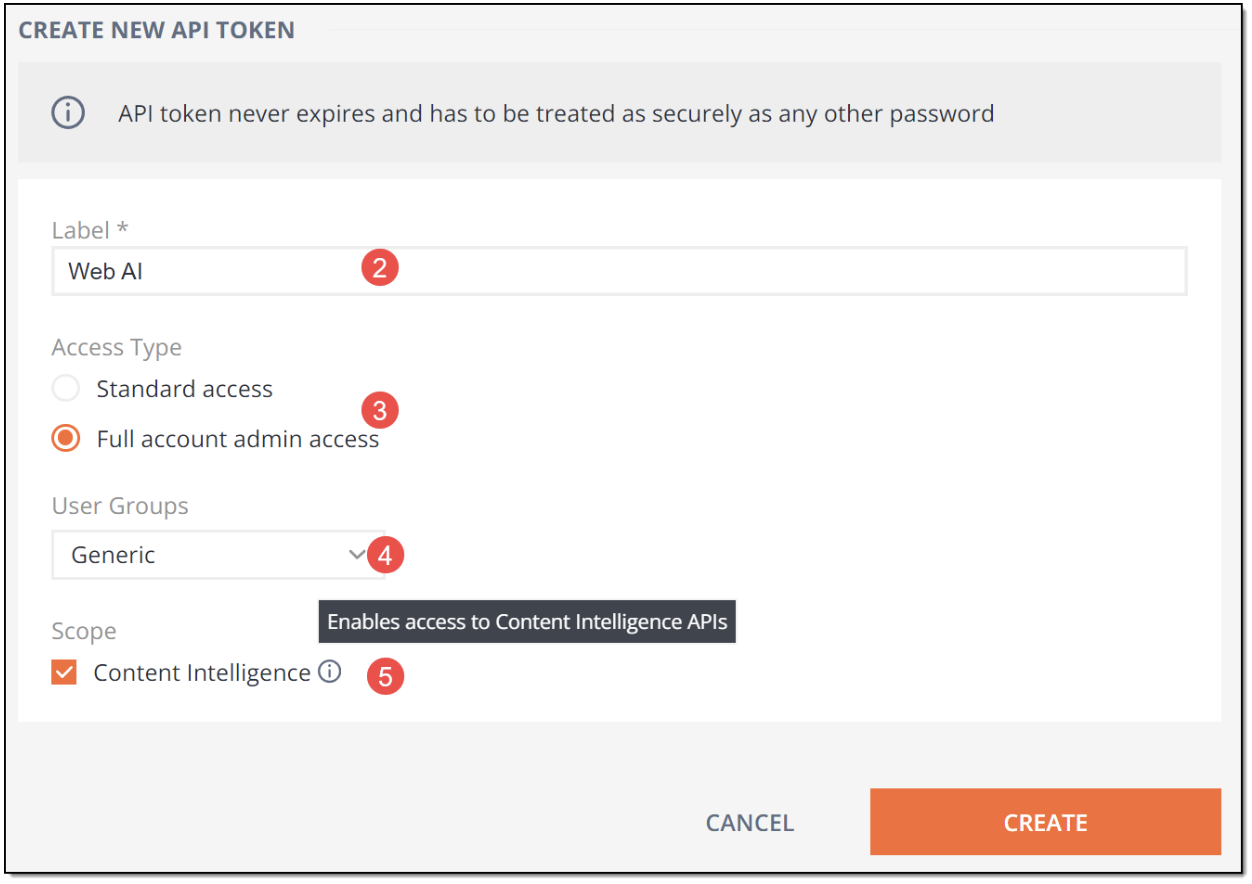 Figure 4. Filling in the Token creation form
☝Note:
The Standard access type does not provide the user with the permissions to access settings or administrative configurations. If your user needs such permissions, select the Full account admin access type.
Once done, the next window appears, where you can see the API token you have just created. If you fail to copy and save it immediately after the creation, you might not be able to copy it when needed.
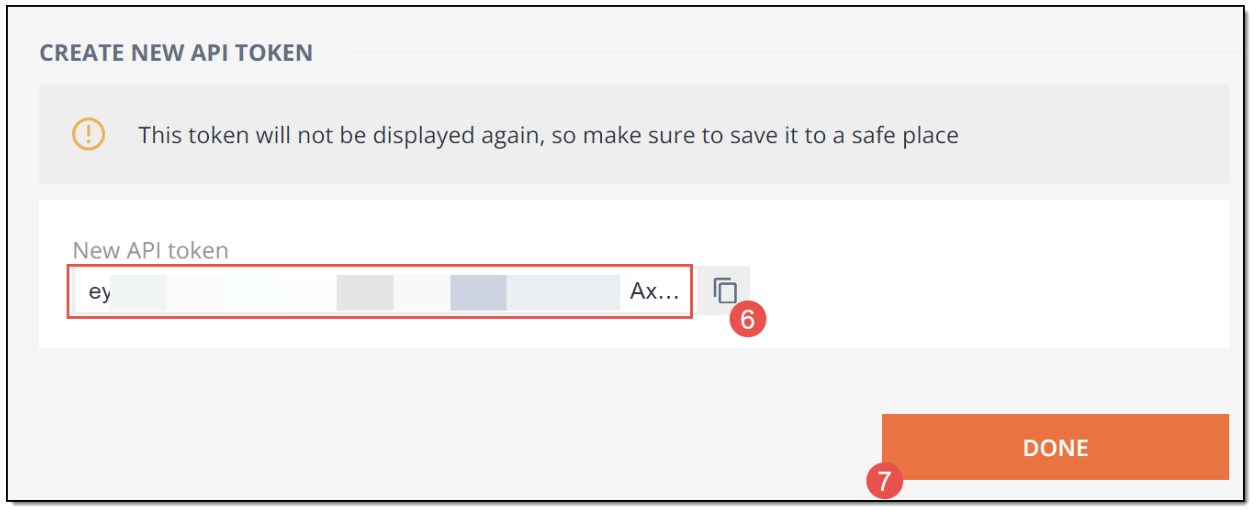 Figure 5. Viewing and copying the created API token
Once finished, click the DONE button to get back to the API token management table and check whether the token you have just created appears on the list.
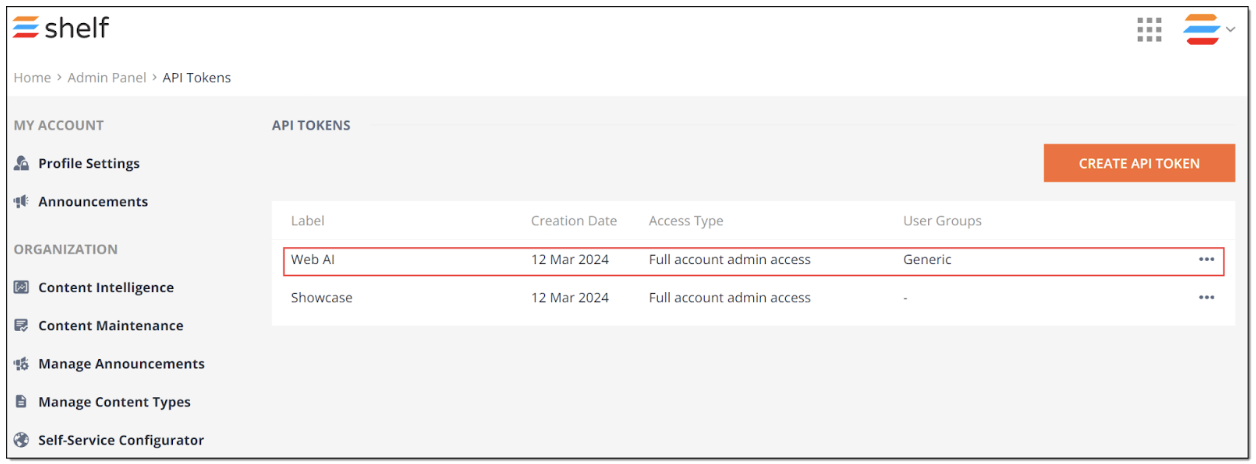 Figure 6. Viewing the created API Token
Revoking API Token
When some specific user group dissolves or if it no longer needs access to the Shelf resources from an external platform or solution the Shelf product is integrated with, you can revoke the API token created for that group.
From the technical standpoint, revoking the token causes the removal of the user group permissions associated with the specified token used to access the Shelf’s protected resources.
In order to revoke the API token, navigate to the Admin Panel, select the API Tokens option (1). Following that, you get to the API Tokens page.
On this page, locate the API token that you want to revoke and click the More actions (2) menu button (...) next to it.
From the menu list that drops down, select the Revoke option (3).
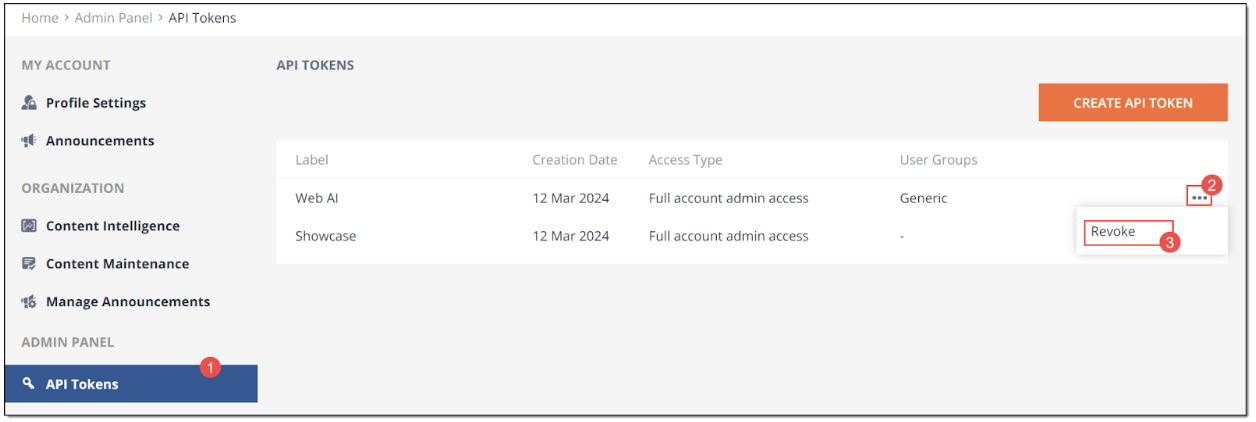 Figure 7. Revoking the API token
In the confirmation dialog that appears, confirm your choice to revoke the token by clicking the YES, REVOKE button.
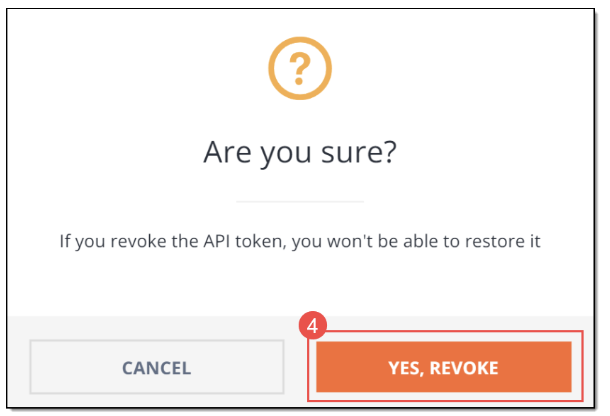 Figure 8. Confirming the token revocation
Once done, wait for the token revocation message to shortly pop up in the window and then refresh the page to see if the token has been removed from the list.
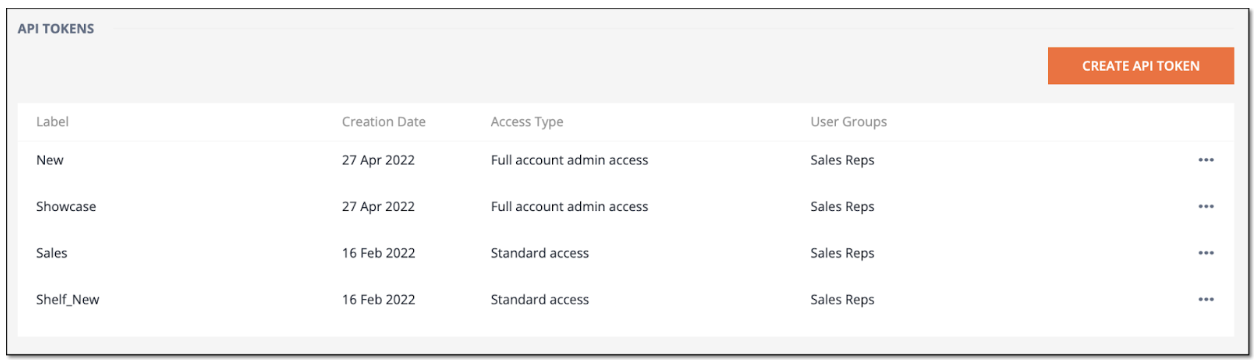
Figure 9. Checking the token deletion
If you no longer see the respective API token on the list of available tokens, it means that you have just successfully revoked it.
Testing the Shelf API Token operation
Once you have created the API token on Shelf, you can test its operation, that is whether it executes its main feature - enables the required authentication and authorization for the relevant users on external platforms where the Shelf products are integrated.
The most convenient way to test the Shelf API token operation is via Postman.
To do that, follow the below steps.
- Login to your Shelf account and open any Gem, folder, or library there.
- Once the Gem opens for viewing, go to the URL in your browser address bar and copy the Gem ID, which is a combination of digits and letters between …/read/ and ?, in our case - 0491484a-8504-4349-a8d3-66064e991577.
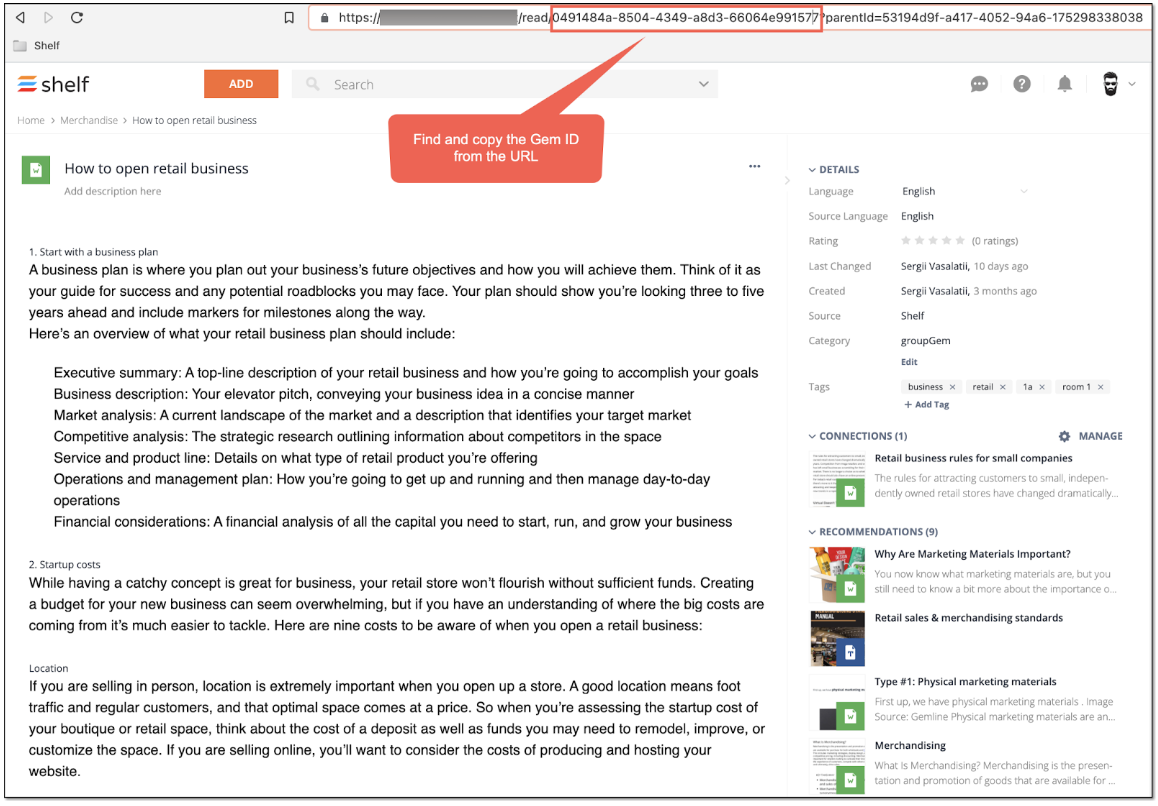 Figure 10. Finding and copying Shelf Gem ID
3. Open a new window or tab in your browser and log in to your Postman account. Open your workspace, find the Requests option in the right-side list panel, and click the Create new request icon (+) as shown in the figure below.
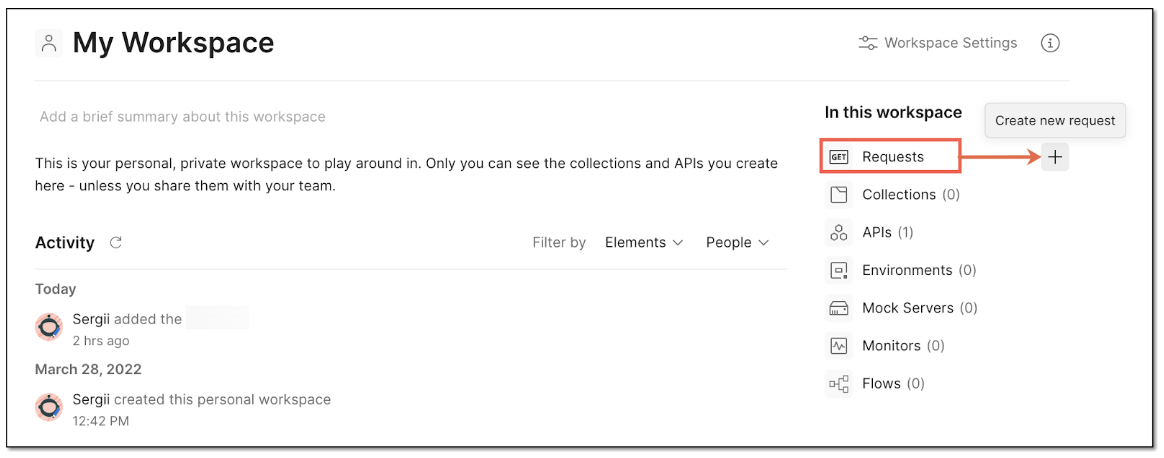 Figure 11. Accessing the Requests feature on Postman
4. In the new window that appears, enter the Shelf API URL address based on the geography/region you are assigned to, which in our case is https://api.shelf.io and corresponds to the US region. Then indicate that you are calling the Gems - /gems/v1/, and then enter the ID of the Gem you are calling, in our case - 0491484a-8504-4349-a8d3-66064e991577.
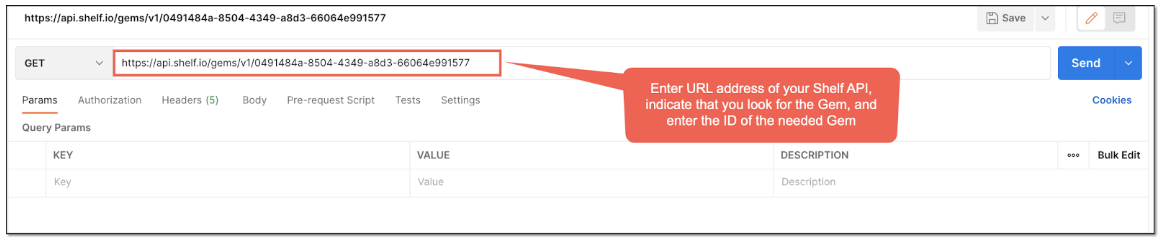 Figure 12. Populating the request line
☝Note:
As of now, Shelf is presented in the United States, Canada, and Europe. Therefore, each of these regions has their own API URL, which are as follows:
- Shelf API URL for the United States: https://api.shelf.io
- Shelf API URL for Canada: https://api.shelf-ca.com
- Shelf API URL for Europe: https://api.shelf-eu.com
5. Once the GET request line is populated, select the Headers tab and then fill in the KEY and VALUE fields of the Headers table. Click the KEY field and start entering Authorization there. Select the suggested option.
 Figure 13. Populating the Authorization header
6. In the VALUE field, paste the API token you have previously created and copied on Shelf.
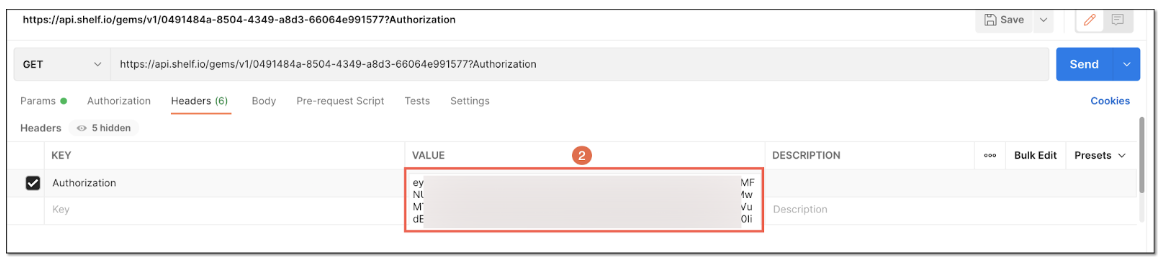 Figure 14. Inserting the API token
7. Once done, click the Send button to send the API request to Shelf’s API. If everything is ok with the API URL and the Gem ID, and if the API token is correct and ensures the proper authorization, you can expect to see the following response on the screen.
 Figure 15. Viewing the response from Shelf API
8. You can also copy the full response in the JSON format for a deeper analysis.
If the response is returned with the 200 OK status and if no error messages or error codes are displayed, it means that you have successfully accomplished testing the Shelf API token.