
Shelf Answer Assist Integration with Genesys Cloud: Installation and Configuration Guide
Document Version History
Version number | Modified by | Modifications made | Date modified | Status |
1.0 | Shelf | Initial release of the document. | 14 June 2021 | Expired |
1.1 | Shelf | Updates made to the document to include new graphics, new wordings, and new style and layout to bring it to compliance with the corporate tone and voice. | 28 September 2022 | Expired |
1.2 | Shelf | The Answer Assist Configuration section was reworked to match the change in suggestion sources. Figures were replaced to match the new version of Shelf’s Answer Assist. Multiple corrections were made to the text as well. | 31 October 2022 | Expired |
1.3 | Shelf | The document was updated to include the Suggestion Sources and Feedback features configuration sections by means of reference. | 8 November 2022 | Active |
Document Purpose
This document describes the steps that are necessary to set up and configure Shelf's Answer Assist Integration with Genesys Cloud.
In order to use the Answer Assist feature, Shelf Support needs to be contacted to configure your account.
If you require further assistance, please do not hesitate to contact us at support@shelf.io or from the in-app chat support within the Shelf platform.
Introduction
The Shelf Answer Assist now supports two different providers that are responsible for content suggestions:
Shelf AI Suggestions (powered by Shelf AI Recommendations engine based on Shelf FAQs)
Google (powered by Google DialogFlow)
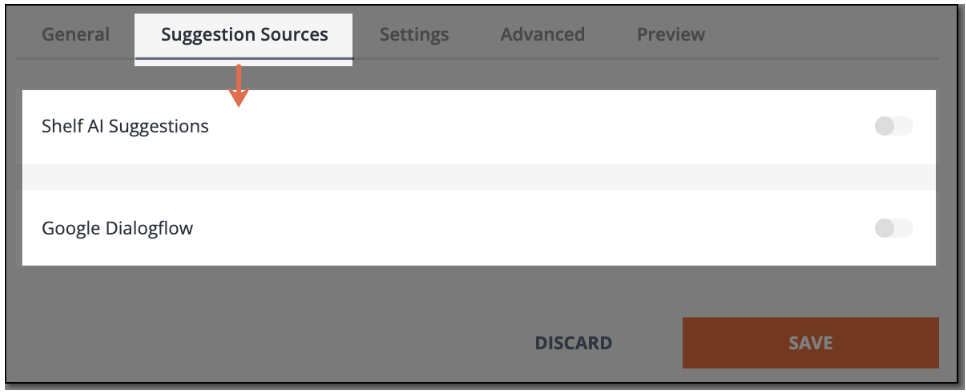
Figure 1. Supported suggestions sources in Answer Assist
Before starting the configuration process for Answer Assist, we suggest some content be available on your Shelf account so that Answer Assist can actually deliver content.
Answer Assist Configuration
Configuring the Shelf AI Suggestions Provider
This step is needed to allow Answer Assist to feed in AI-matched context suggestions to agents that will help them improve the quality of interactions with your organization’s customers. Detailed information on the Shelf AI Suggestions Provider and its configuration can be found in the respective section of the Shelf Answer Assist End-to-End Guide.
Agent Feedback
This feature is also enabled in the Answer Assist Configurator in the Shelf Admin Panel and allows your organization’s agents to leave their feedback on suggestions they receive in Answer Assist More details on the Feedback feature in Answer Assist, its configuration and usage can be found in the respective section of the Shelf Answer Assist End-to-End Guide.
Genesys Cloud Configuration
Configuring Queue
- Navigate to Admin, then Queues.

Figure 2. Finding and accessing the Queues menu in Genesys Cloud
- Select the Create Queue button and create a Queue with the desired name.

Figure 3. Creating a Queue in Genesys Cloud
- Add members to the Queue who are expected to be setting up and using the Shelf integration.

Figure 4. Adding members to the Queue
- Under the Routing tab, set the Evaluation Method to Disregard skills, next agent and then save the Queue.

Figure 5. Adding the routing evaluation method for the Queue
Installing Answer Assist as an Interaction Widget
Installing Answer Assist via AppFoundry
- In Genesys Cloud go to Admin > Integrations.
- Click the + Integrationsbutton in the top-right corner.

Figure 6. Adding a new integration in Genesys Cloud
- In the search bar, type Shelf and select Answer Assist Express.

Figure 7. Finding and selecting Agent Assist Express in AppFoundry
- Click Install and agree to the Terms of Service by selecting the respective checkbox in the popup window that appears.
- Take a look at the Configuration Tab subsection to get an understanding of this tab purpose and details before activating the application.
- Navigate back to the Details tab to activate the app and then Savethe settings.

Figure 8. Activating the Shelf Agent Assist Express in Genesys Cloud
- Your Answer Assist Express is ready to go from the Interactionview in Genesys Cloud.

Figure 9. Viewing the Answer Assist widget in Genesys Cloud
Installing Answer Assist via Installation Wizard

Figure 10. Finishing the Answer Assist installation procedure
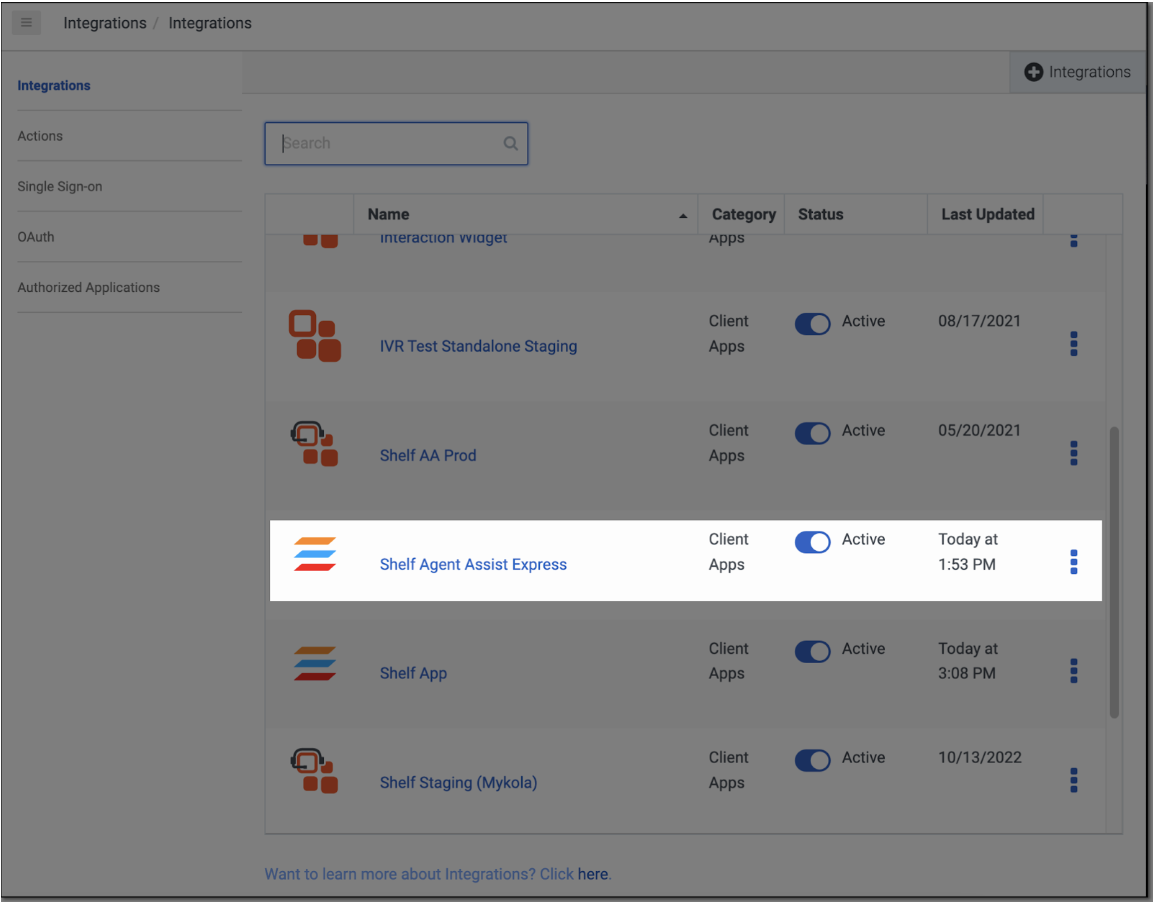 Figure 11. Verifying that Answer Assist is active and added to the Genesys integration
Installing Answer Assist as an Interaction Widget Application Type
- In Genesys Cloud go to Admin > Integrations.
- Click the + Integrationsbutton in the top-right corner.

Figure 12. Adding a new integration in Genesys Cloud
- Install the Interaction Widgetintegration.

Figure 13. Installing the Interaction Widget integration in Genesys Cloud
- In the Detailstab, enter a name for the widget.

Figure 14. Naming your Interaction Widget
- Select the Configurationtab and fill in all the fields as shown below.

Figure 15. Filling in the Configuration fields for your Interaction Widget
https://purecloud.shelf.io/agent-assist/?conversationId={{pcConversationId}}&environment={{pcEnvironment}}&shelfConfigurationId=replace_this_text_with_id_of_configuration
Application URL (EU Shelf Instances)* -
https://purecloud.shelf-eu.com/agent-assist/?conversationId={{pcConversationId}}&environment={{pcEnvironment}}&shelfConfigurationId=replace_this_text_with_id_of_configuration
Id_of_configuration is located in the Shelf Admin Panel > Answer Assist Configurator → Your Answer Assist Configuration → General tab
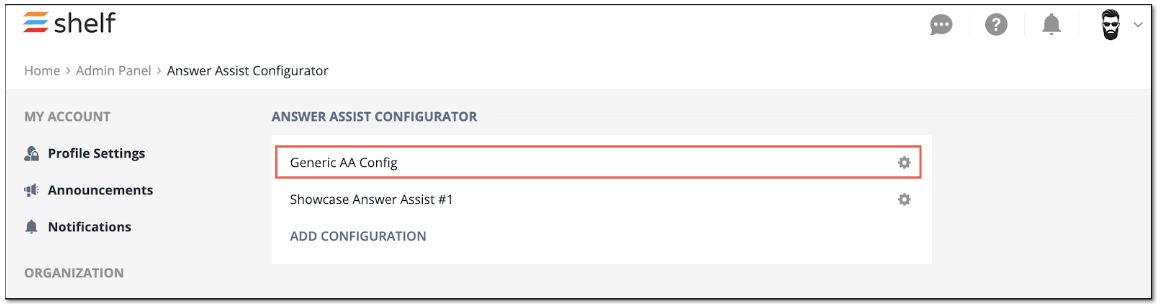
Figure 16. Accessing your Answer Assist configuration in the Shelf Admin Panel

Figure 17. Finding and copying your Answer Assist configuration ID

Figure 18. Adding the user group permitted to access Answer Assist
{ "lifecycle": { "ephemeral": false, "hooks": { "stop": false, "blur": false, "focus": false, "bootstrap": false } }, "i10n": { "en-us": { "name": "Shelf Answer Assist Express" } }, "icon": { "48x48": "https://static.shelf.io/images/logo/shelf_logo.svg", "24x24": "https://static.shelf.io/images/logo/shelf_logo.svg" }, "monochromicIcon": { "vector": "https://static.shelf.io/images/logo/icon-pure-black-64x64.svg" } } |
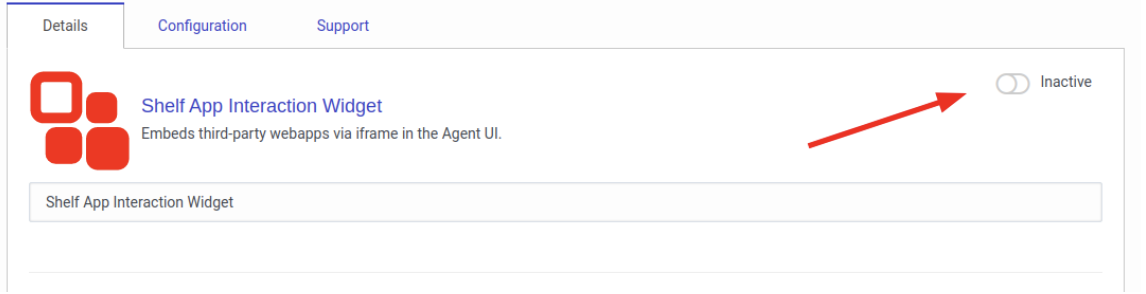
Figure 19. Activating the installed Interaction Widget integration
Configuration Tab
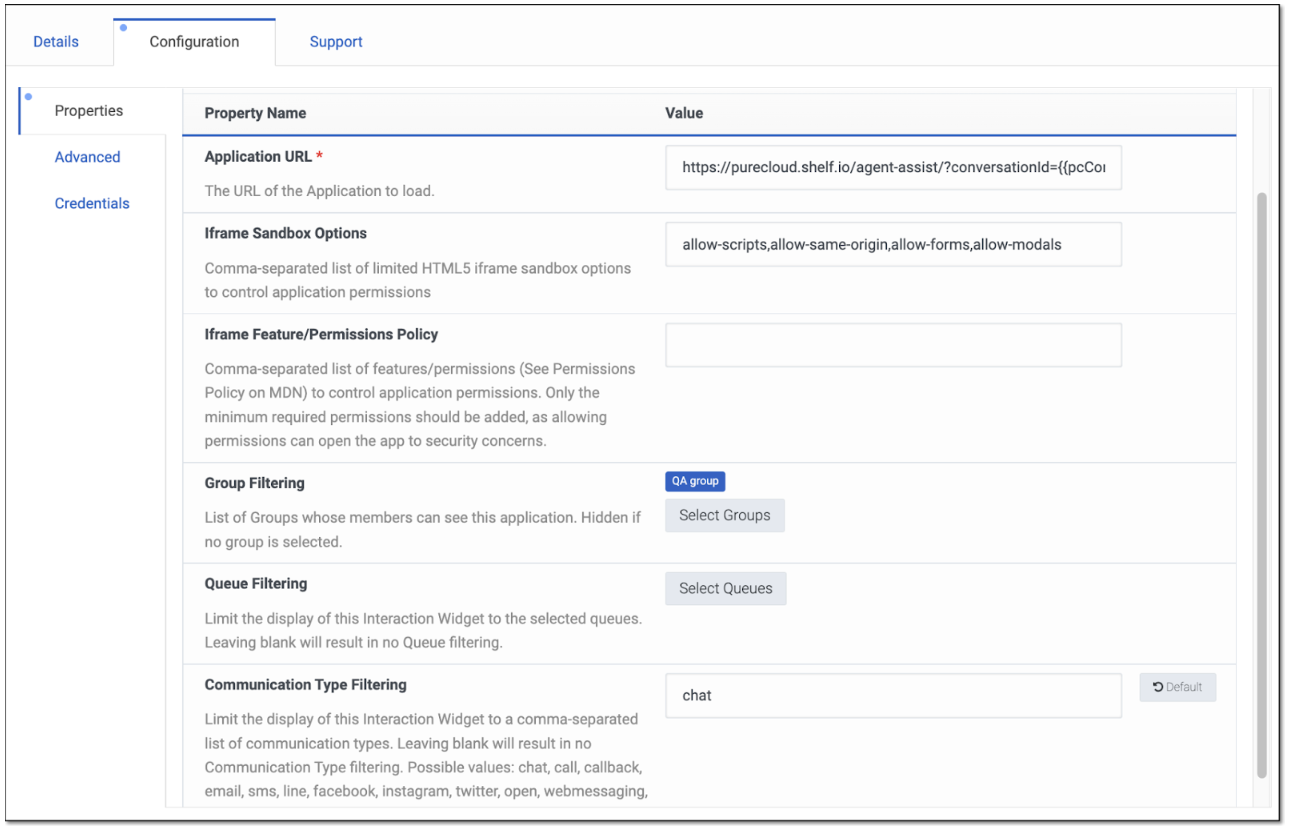
Figure 20. Viewing the Configuration tab for your Interaction Widget
https://purecloud.shelf.io/agent-assist/?conversationId={{pcConversationId}}&environment={{pcEnvironment}}&shelfConfigurationId=your_configuration_id
Iframe Sandbox Options
Configuring Answer Assist as a Script
Configuration
Chat
- Go to Admin - Contact Center - Scripts.

Figure 21. Accessing the Scripts menu in Genesys Cloud
- In the page that appears, click the Create button and create a new custom blank script. Go to the Add components tab and click to add a new Web Pagecomponent.

Figure 22. Creating the blank script

Figure 23. Adding the Web Page component to your new script
- Go to the Layout section of the Web Page settings, remove the margin by setting it to 0on every side and make the component full width and height by selecting the options indicated in the figure below.

Figure 24. Editing the layout
- Open the Common section and in the Web Page Source paste the following URLs. The script can work both with Chat and Email interactions, therefore the URLs and properties are slightly different.
https://purecloud.shelf-eu.com/agent-assist/?conversationType=chat&environment=mypurecloud.com&conversationId={{Scripter.InteractionID}}&shelfConfigurationId=replace_this_text_with_id_of_configuration&version=2
Additionally make sure that conversationId is set to an actual Scripter.Interaction IDvariable (PureCloud should recognize it as a variable).
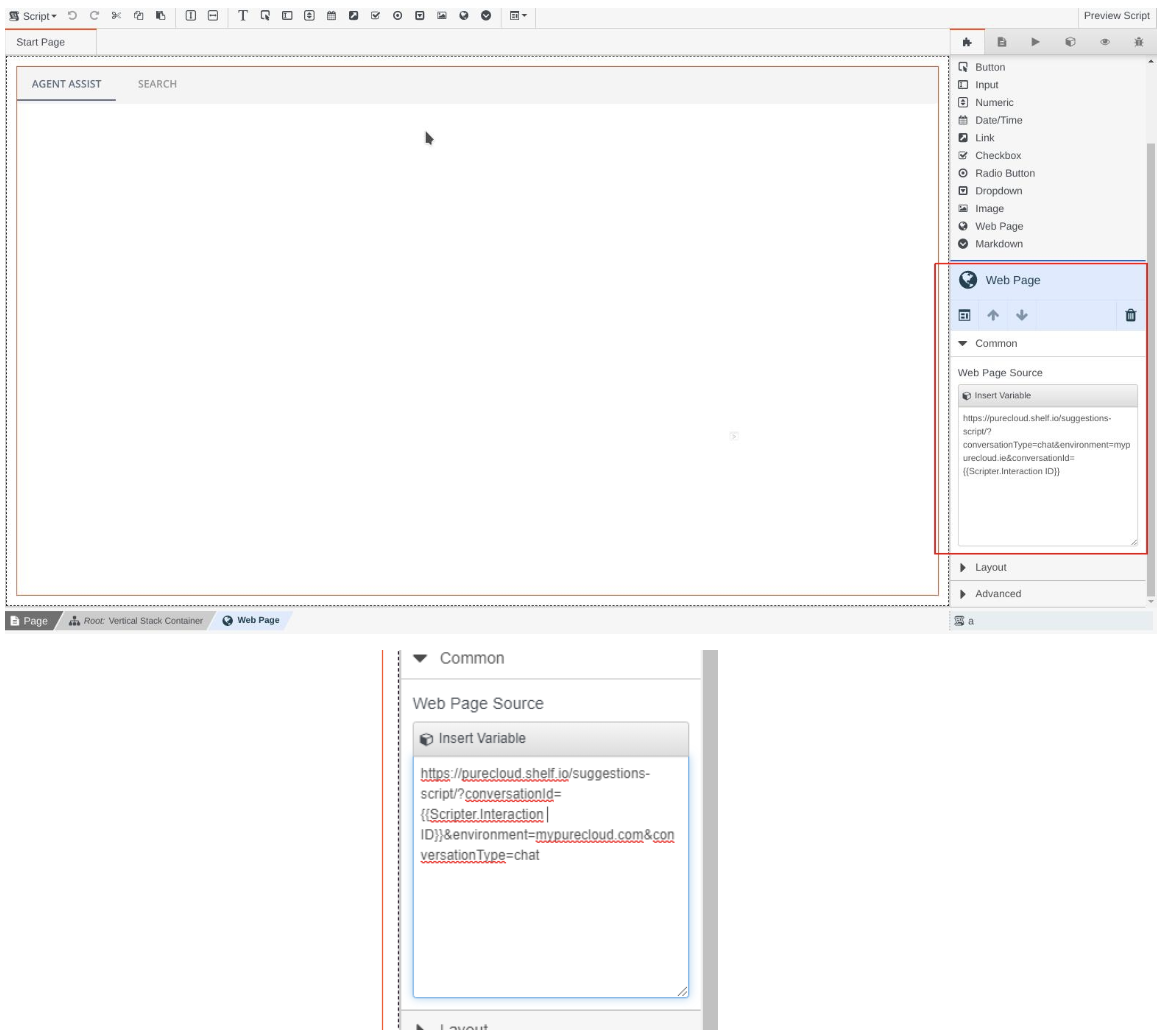
Figure 25. Indicating the web page source address
Figure 26. Accessing your Answer Assist configuration in the Shelf Admin Panel
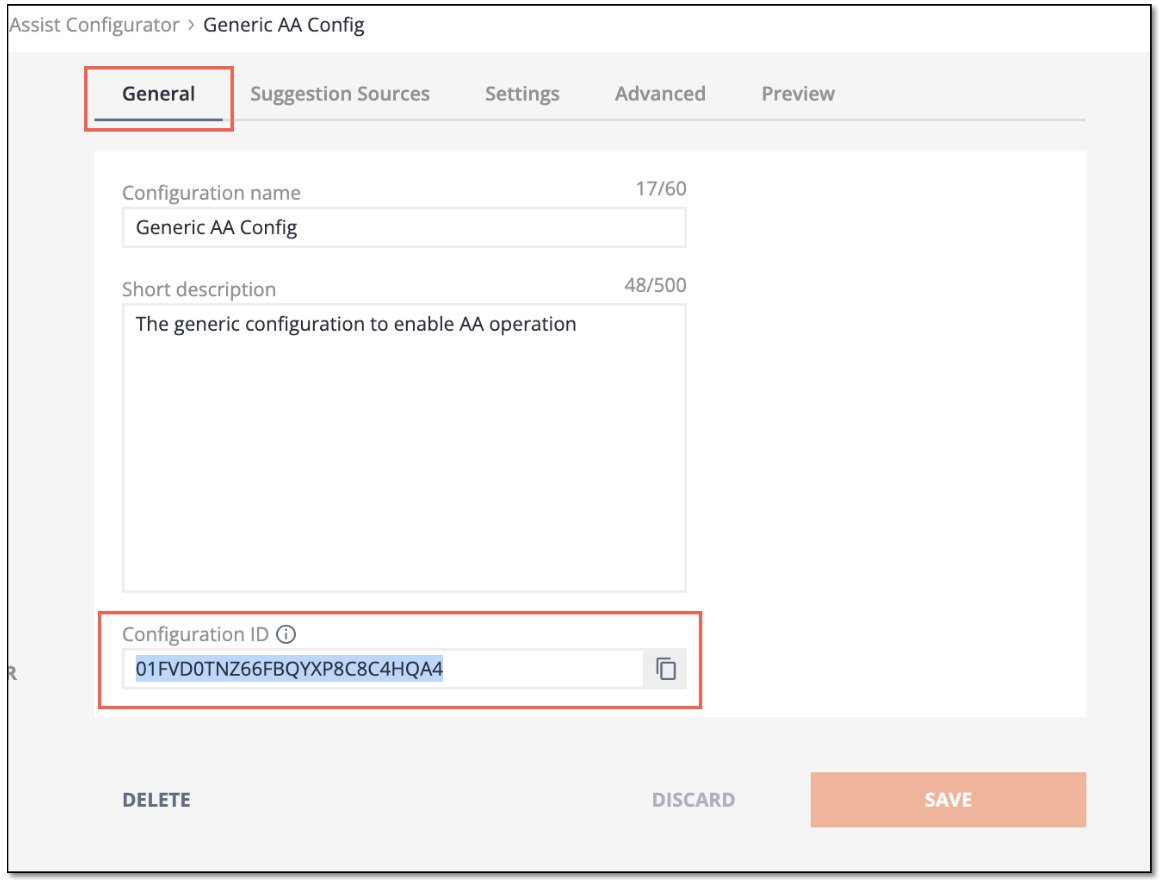
Figure 27. Finding and copying your Answer Assist configuration ID
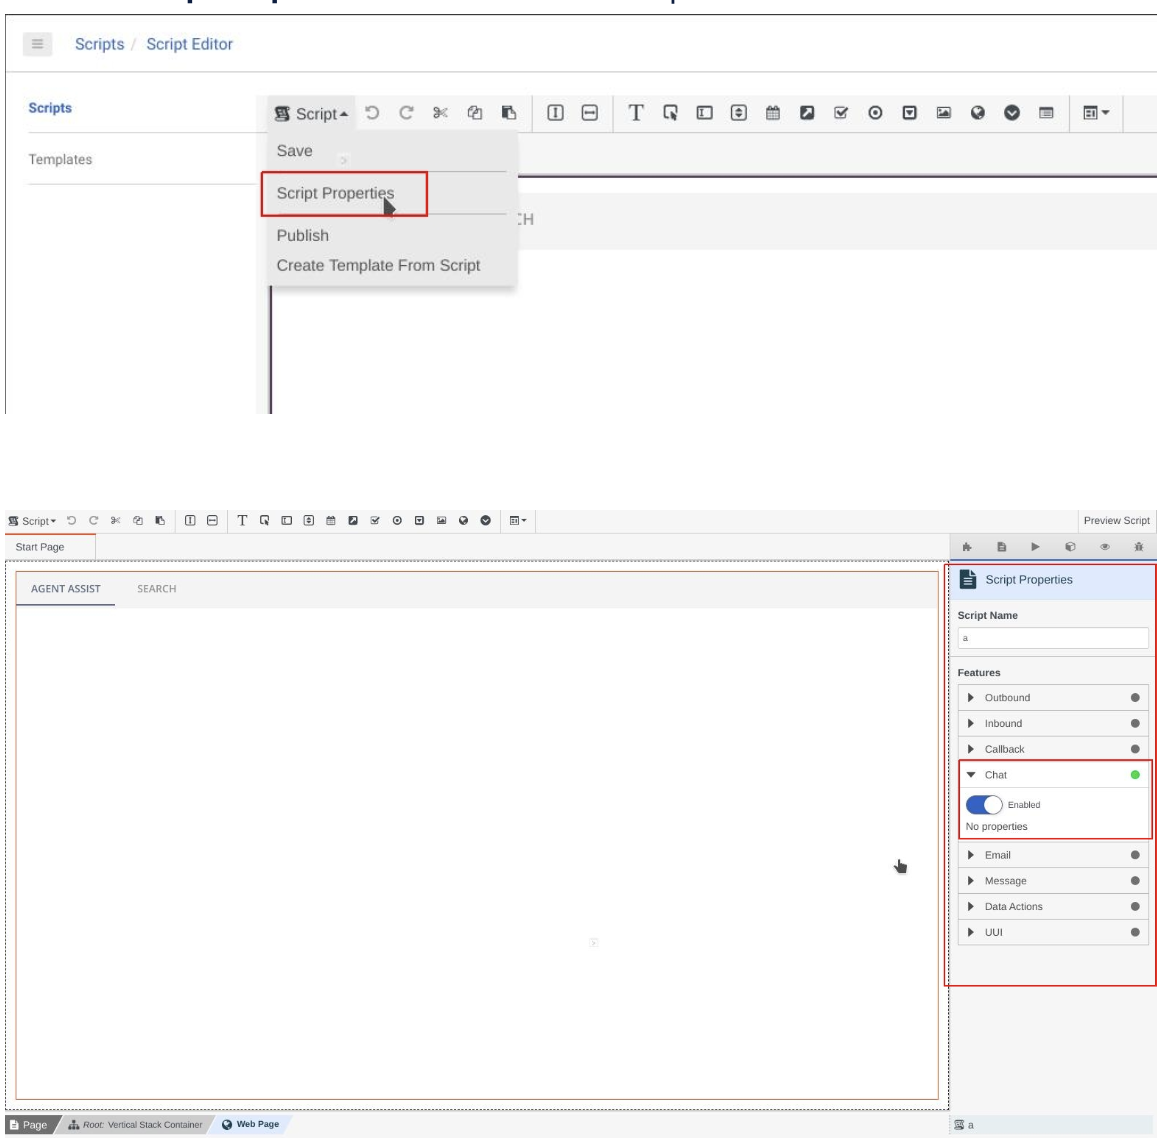 Figure 28. Enabling the Chat feature for the script
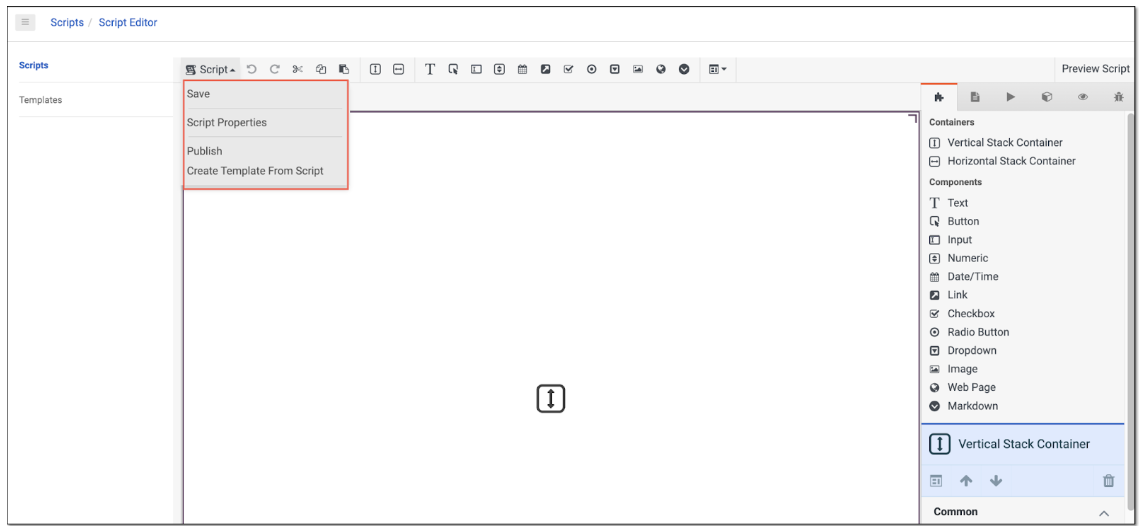
Figure 29. Saving and publishing the script
Using Your Answer Assist Integration
Queue
- Go to Admin > Queues, find the Queue that you created at the beginning and open the Edit Mode.

Figure 30. Accessing the Queue editing mode
- In the Chat settings tab, start typing the name of the script that was created for the chat during the Chat step and Savethe Queue.
 Figure 31. Finding the needed script
Chat Interaction
- Enable the Queue by switching the toggle on.

Figure 32. Enabling the Queue
- Start a chat and ask a question, for example, “Can you help me with my dog issue?”. Also make sure that there’s sufficient content (Wiki Gem type) in your Shelf library that will have an answer for the question that’s being asked.

Figure 33. Sending the chat message
- From the agent panel, accept the chat.

Figure 34. Accepting the inbound interaction
- Switch to the Scripts tab and enjoy the Answer Assist.

Figure 35. Using Answer Assist and its suggestions in Genesys Cloud