
Shelf Answer Assist Integration with Kustomer: Installation and Configuration Guide
Document Version History
Version number | Modified by | Modifications made | Date modified | Status |
1.0 | Shelf | Initial release of the document. | 17 November 2022 | Active |
Document Purpose
This document describes steps that are necessary to set up and configure Shelf Answer Assist Integration with Kustomer
In order to use the Answer Assist feature, Shelf Support needs to be contacted to configure your account.
If you require further assistance, please do not hesitate to contact us at support@shelf.io or from the in-app chat support within the Shelf platform.
Shelf App Installation
- Log in to your Customer account using your Admin-level credentials.
- Once logged in, find and select the Appsmenu in the sidebar panel.

Figure 1. Accessing the App Directory on Kustomer
- You are redirected to the App Directory page, where you can use the platform-wide search to look for the Shelf App to be installed. Enter Shelf in the search bar and hit the Enter button on your keyboard.
If the search is successful, the Shelf App card is displayed underneath the search bar, as shown in Figure 1 above. - Click on the Shelf App card to continue the installation procedure.
- Once clicked, you get to the Shelf App installation window where you can see brief details about the application and its version.

Figure 2. Viewing details of Shelf App to be installed
- In the Shelf App installation window, find and click the Install button to start the installation.
- Once clicked, a popup window is displayed listing permissions you need to have to install the Shelf App and warning you about what exactly you agree to by installing the application. If you agree, click the Install App button.
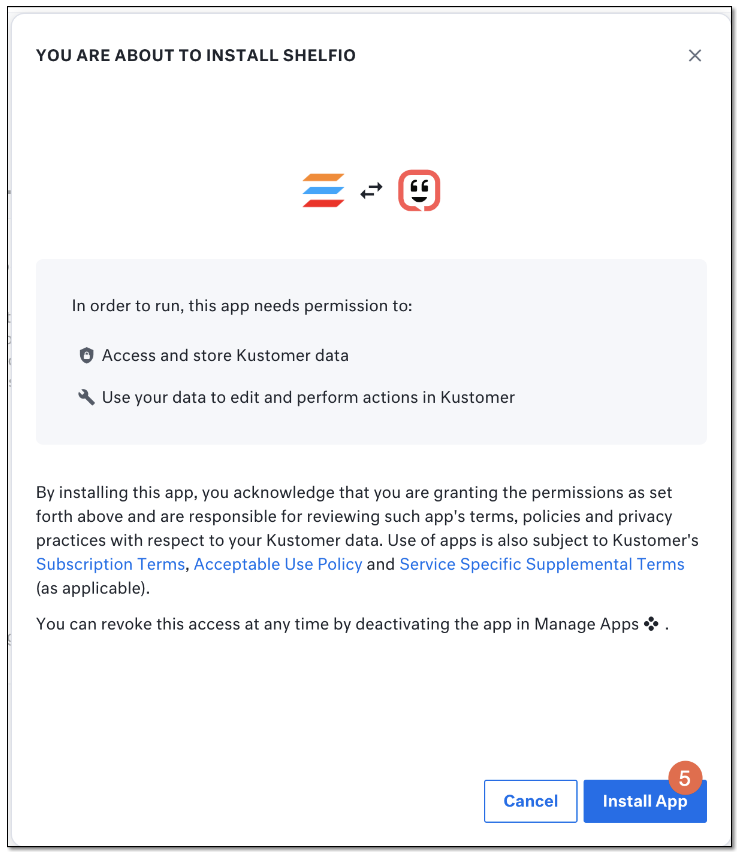
Figure 3. Confirming the Shelf App installation
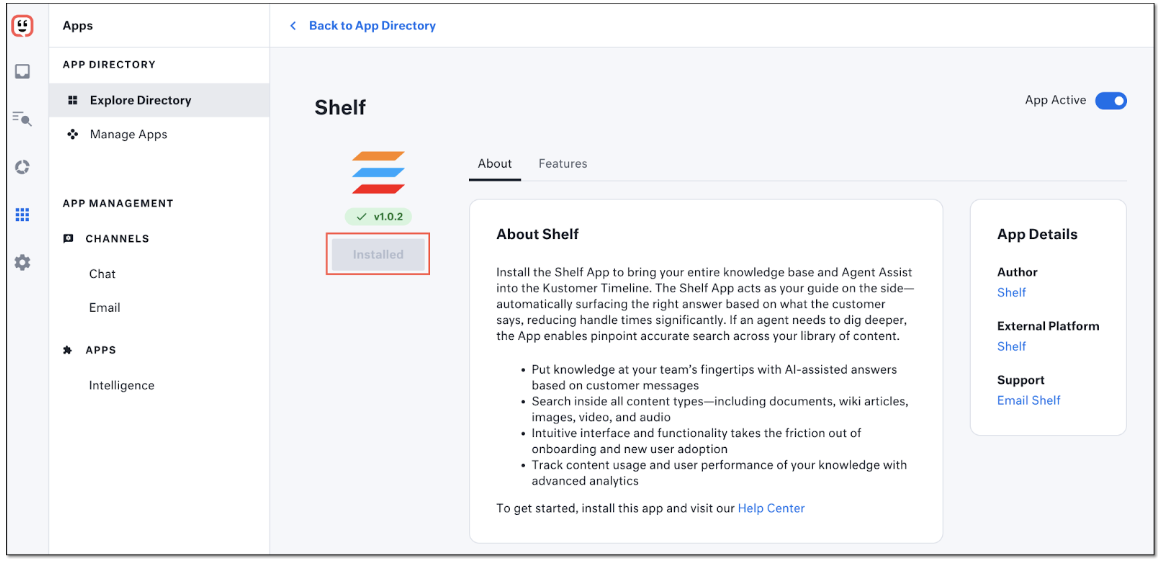
Figure 4. Verifying the Shelf App installation
Shelf App Updating
- Go to Kustomer’s App Directory page by finding and selecting the Appsmenu in the sidebar panel.

Figure 5. Accessing the App Directory page and Manage Apps menu in Kustomer
- Once in the App Directory page, find and select the Manage Apps menu. You are redirected to the page where you can see which apps have been installed in your Kustomer instance. In particular, you can see the Shelf App that you have previously installed. In case there is a new version of the app released and ready for implementation, the color of the label with the app version number turns yellow as in Figure 5 above. Additionally, Kustomer informs you that you need to take care of the app by showing the respective notification.
- Click anywhere in the card of the app that requires your attention.
- In the window - the Shelf App page - that appears, find and click the Updatebutton.

Figure 6. Starting the Shelf App updating procedure
- Wait until the updating process is complete. If you see that the version label color is changed to green, it means that the Shelf App has been successfully updated to the newest version.

Figure 7. Verifying the Shelf App update completion
Shelf App Activation
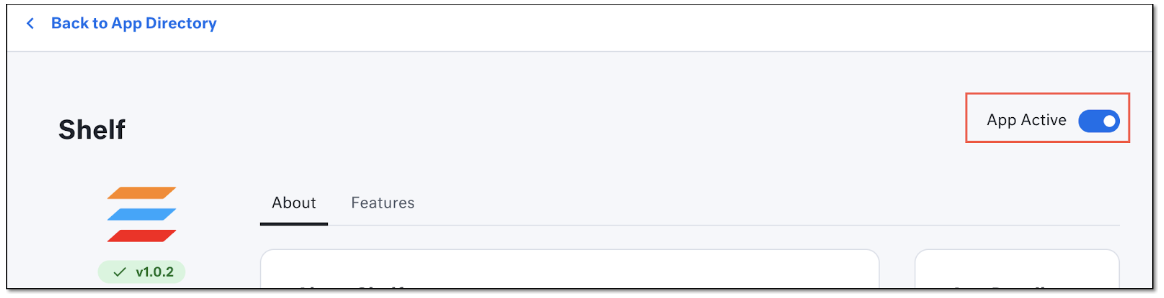
Figure 8. Activating the Shelf App after installation
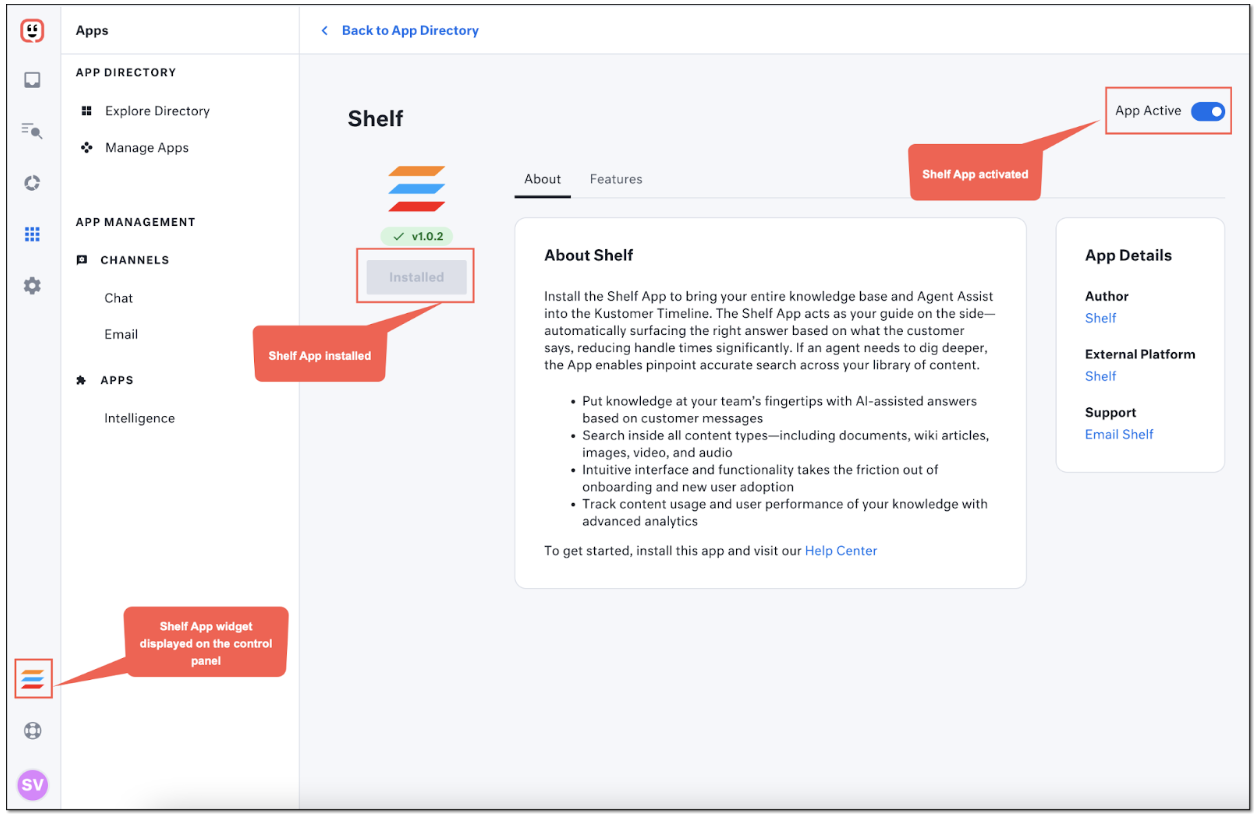
Figure 9. Viewing the Shelf App status and widget
Shelf App Settings
- Navigate to the App menu of the Kustomer sidebar panel.
- In the App options menu that expands, find and select the Shelf option.
- In the Shelf Answer Assist page that appears, fill in the needed fields with appropriate data.
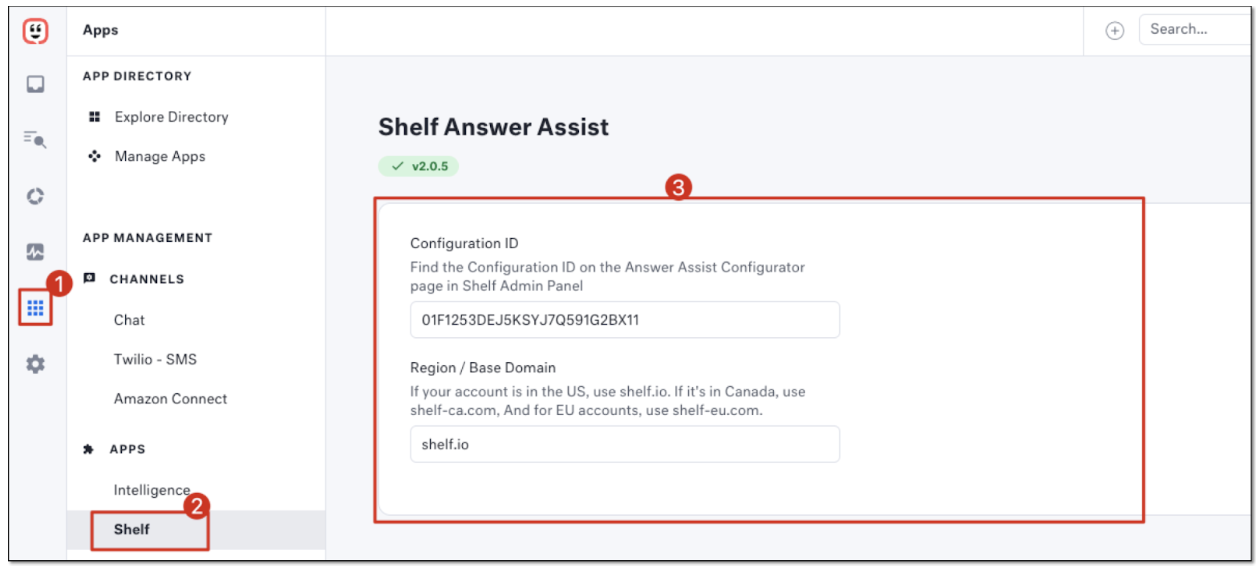
Figure 10. Accessing and configuring the Shelf App settings in Kustomer
- Agent Assist configuration ID: it’s the identifier of your Answer Assist instance configuration, which can be found in: Shelf > Profile Settings > Admin Panel > Answer Assist Configurator > Your Answer Assist Configuration.
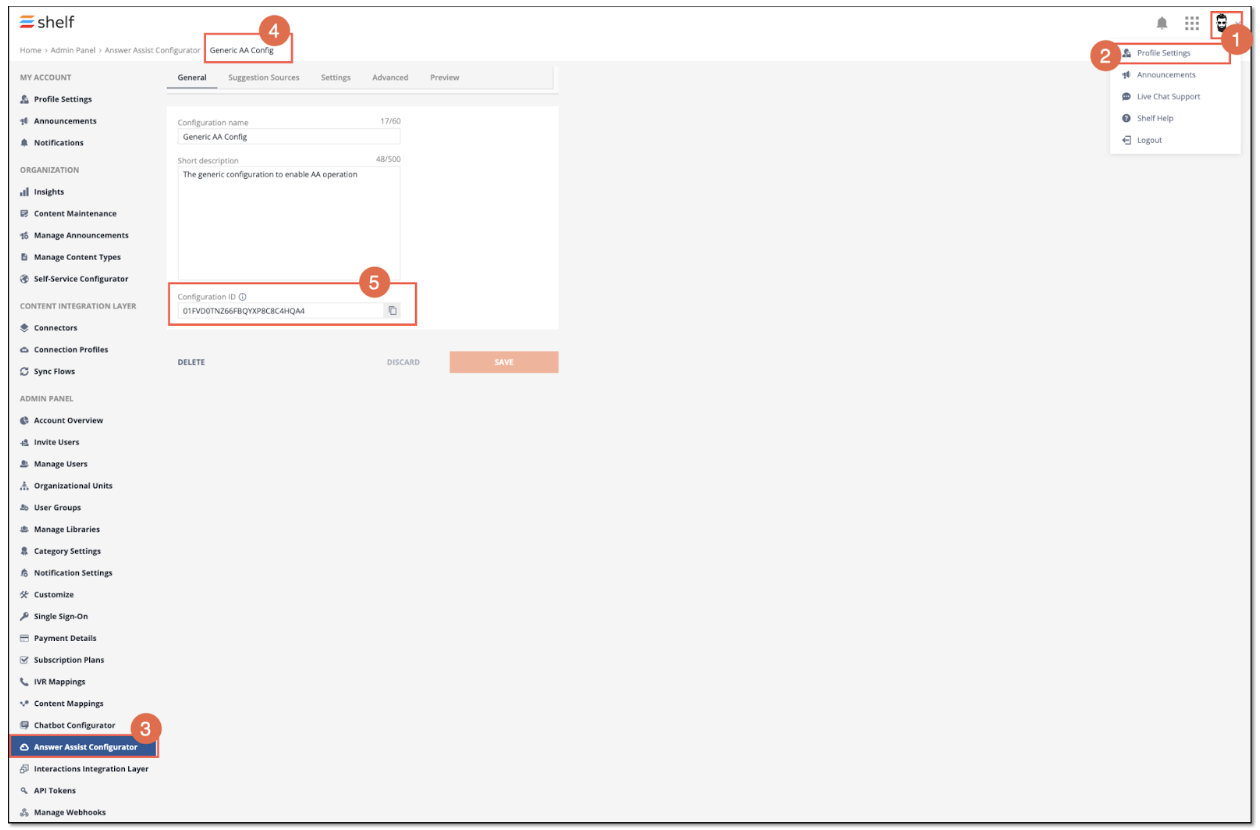
Figure 11. Accessing your Answer Assist Configuration page in Shelf
- Region / Base Domain: It’s an URL address of your Answer Assist integration based on your region or base domain. If your account is in the United States, use shelf.io; if it's in Canada, use shelf-ca.com; finally, for EU accounts, use shelf-eu.com.

Figure 12. Saving the configured Answer Assist settings
Contact Reason Creation in Kustomer
- Navigate to the Kustomer Settings menu and search for Klassesoption there.

Figure 13. Accessing the Settings menu and search for Klasses on Kustomer
- Once the needed option is found, select it to get to its page. When there, find and select the Conversationtile to start adding.

Figure 14. Accessing the Klasses and Conversation attributes
- In the Conversation window, find and click the Create Attributebutton to start creating the needed attribute.

Figure 15. Starting the new attribute creation in Kustomer
- In the next window that appears, fill in the needed fields: add a name for the new attribute, select the type for it from the dropdown list (e.g. single line text), and select how its values are to be arranged - as a list (Option List) or a standalone item (Single Value). Once done, click Createto finish creating the new attribute.

Figure 16. Populating the new attribute fields
- Once done, the new attribute is created and can be used for context suggestions in the Shelf Answer Assist in Kustomer.

Figure 17. Viewing the created attribute
- Copy and save the new attribute - dogBreedStr - for further use in the Shelf configurations.
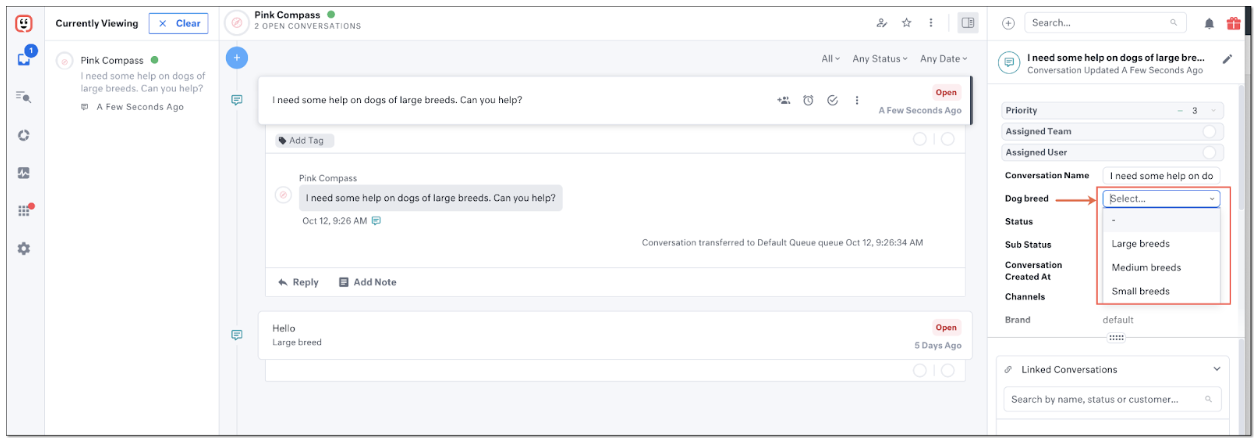
Figure 18. Viewing the created attribute in the conversation details
Configurations in Shelf and in Answer Assist
- Content Mappings feature needs to be enabled for your account
- Libraries with content used as suggestions for external context need to be available
- You should have the Admin role on Shelf.
Verification of the Shelf Answer Assist Operation in Kustomer
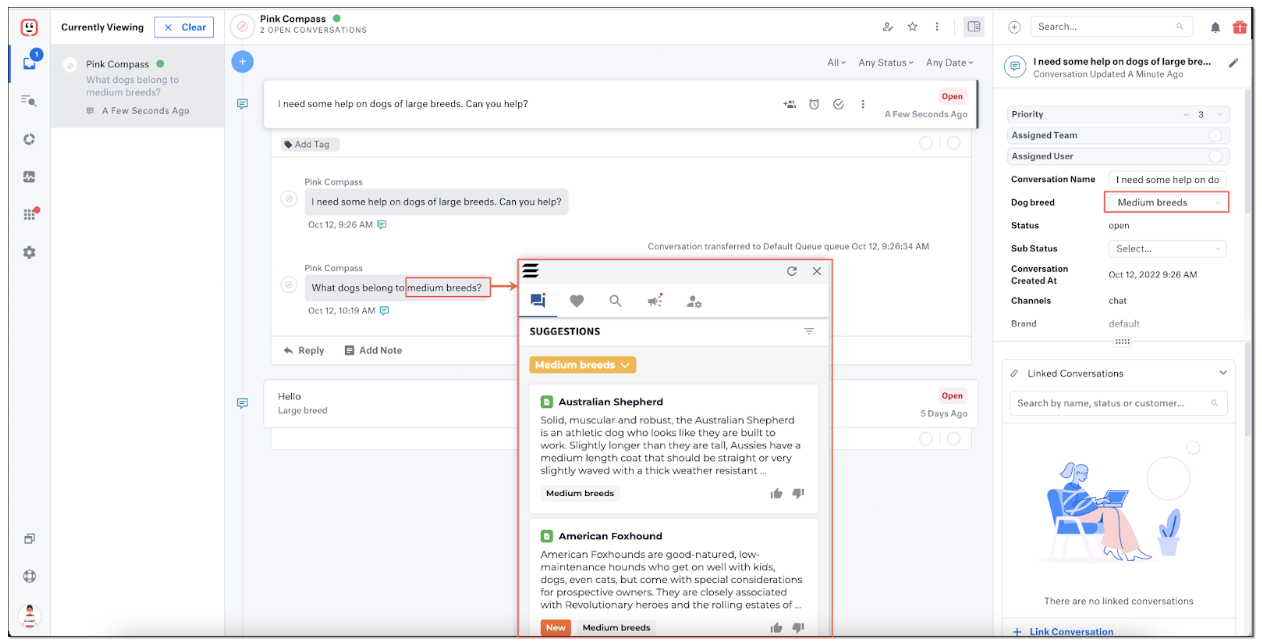
Figure 19. Verifying the context suggestions provision by the Shelf Answer Assist in Kustomer