Shelf’s Chatbot Configuration Guide
Purpose
This document describes steps that are necessary to set up and configure Chatbot.
In order to use the Knowledge Assist feature, Shelf Support needs to be contacted to configure your account.
If you require further assistance, please do not hesitate to contact us at support@shelf.io, via the live chat on the Shelf website or from the in-app chat support within the Shelf platform.
Last Update: 30-July 2021
Create a chatbot configuration
- On the Shelf Admin Panel, go to ‘Chatbot Configuration’ tab and click ‘Add Configuration’.

Configure JSON
- Go to the ‘Settings’ tab and configure the JSON as instructed below (the items highlighted in green color are not required, you can use this documentation as extra help):

{ |
|---|

Test the configuration
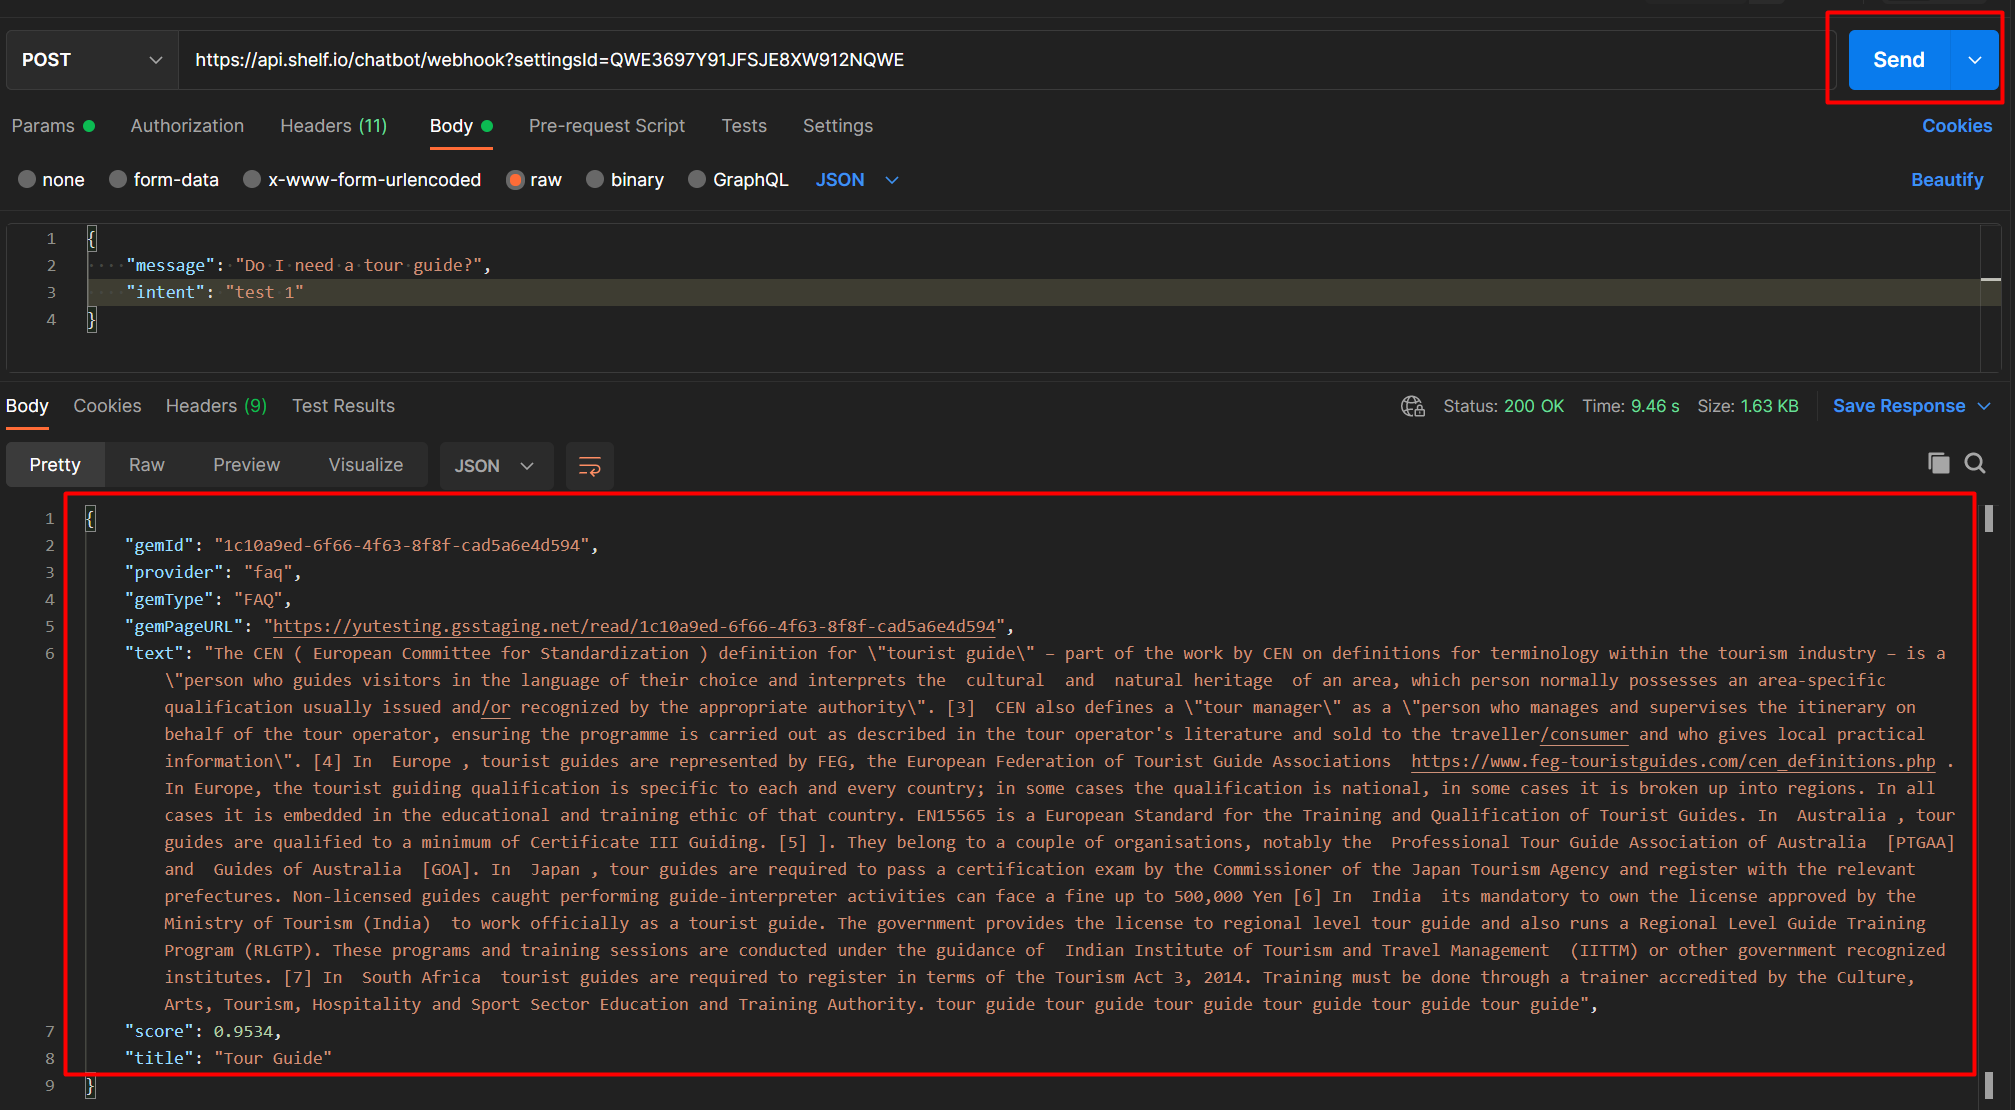
- Use an API client tool (e.g. ‘Postman’) and do the following request:
- paste the following request in the request URL field:
https://api.shelf.io/chatbot/webhook?settingsId=paste here the id of your configuration |
|---|
- Select method ‘POST’
- On ‘Headers’ tab, type ‘x-shelf-email’ and ‘x-shelf-password’ in ‘KEY’ column, your Shelf email address and your Shelf password in ‘VALUE’ column, using the corresponding rows for each

- On ‘Body’ tab paste the following JSON
{ |
|---|
You can copy your configuration id on the ‘General’ tab of your created configuration.