Agent Assist Configuration for Web Messaging
Overview
Genesys Cloud web messaging provides customers with an enhanced experience when they visit your website. Unlike web chat, which provides short-lived, standalone chats, web messaging enables a visitor to enter your site, converse with a bot or agent, and return later to pick up the conversation. With Predictive Engagement, agents can view the entire customer journey as part of the web messaging interaction. Web messaging shares the same features and capabilities as the other Genesys Cloud messaging channels that use ACD messaging to enable agents to respond to customer interactions.
Purpose
This document describes steps that are necessary to set up and configure Web Messaging for Genesys Cloud App.
If you require further assistance, please do not hesitate to contact us at support@shelf.io, via the live chat on the Shelf website or from the in-app chat support within the Shelf platform.
Last Update: 20-October 2021
Agent Assist configuration for Web Messaging
Add a Messenger Configuration
- Follow this instruction

Create a queue
For the purposes of this documentation, we will be creating a new queue to handle web messaging. If you would like to leverage an existing queue, then this section can be skipped.
- Go to Admin -> Queues.
- Click Create Queue, choose a name for the queue.
- Go to Members tab and make sure there are agents that will receive messages on behalf of your Facebook business page.

Setup Inbound message flow
- Go to Architect -> Flows: Inbound Messages.
- Click Add.

- Fill the form with the information about the flow and click “Create”.

- (Optional) In the Flow editor, click on the Start button and choose a new block for Send Response as shown on the screenshot below. This will be the initial Welcome message.

- In the Flow editor, click on the Start button and choose a new block for ACD messaging as shown on the screenshot below.

- Choose a queue on the right sidebar and click Save and Publish to publish the new flow.

Setup Messenger Configuration
- Setup the messenger window configuration. Go to Admin -> Messenger Configuration..

Setup Messenger Deployment
- Setup the messenger window configuration. Go to Admin -> Messenger Deployment..


Configure Agent Assist as Interaction Widget
- Go to Admin -> Integrations and add Interaction Widget.


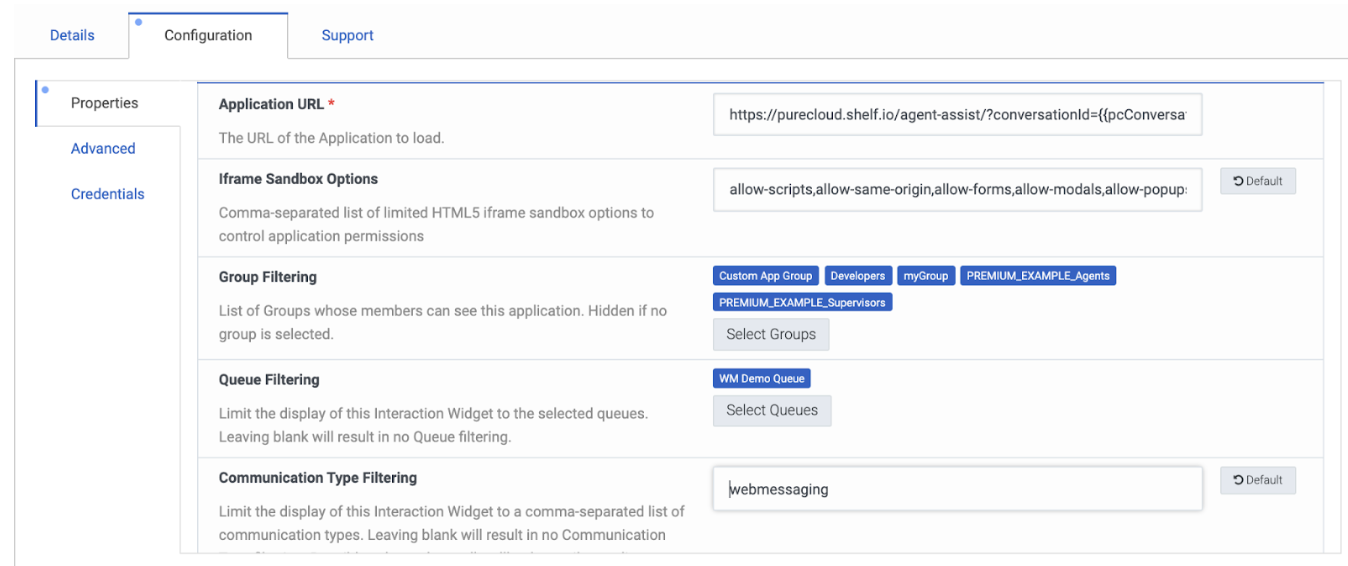
- Set the name, open Configuration tab and set the configurations.
Application URL (US Shelf Instances)* -
https://purecloud.shelf.io/agent-assist/?conversationId={{pcConversationId}}&environment={{pcEnvironment}}&conversationType=social-media&shelfConfigurationId=replace_this_text_with_id_of_configuration
Application URL (EU Shelf Instances)* -
https://purecloud.shelf-eu.com/agent-assist/?conversationId={{pcConversationId}}&environment={{pcEnvironment}}&conversationType=social-media&shelfConfigurationId=replace_this_text_with_id_of_configuration
Id_of_configuration is located in Shelf Agent Assist Configurator → Configuration from the list → ‘General’ tab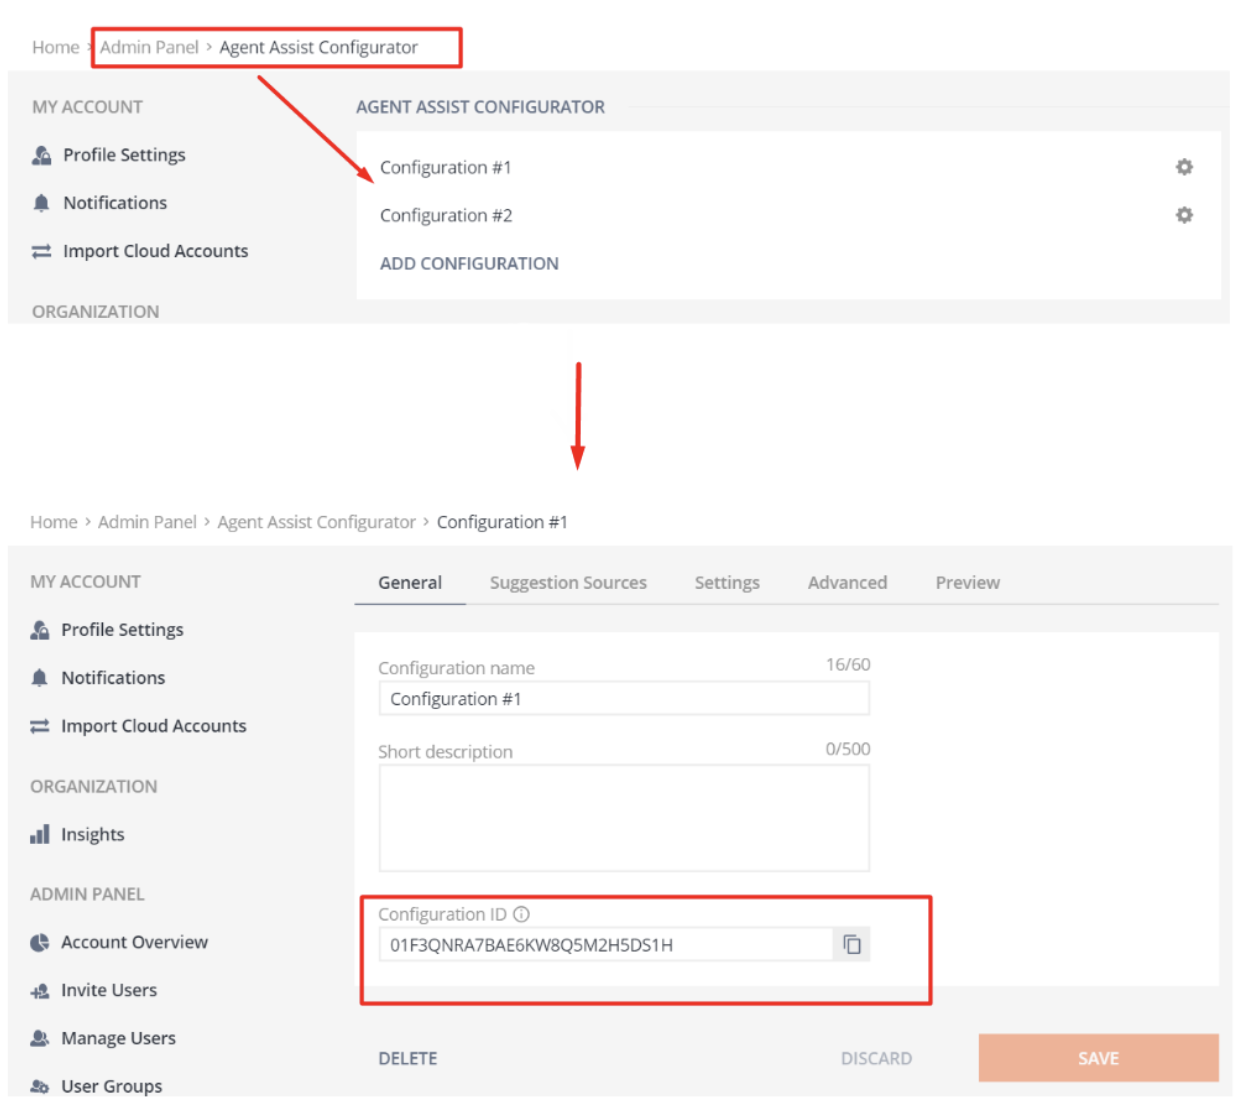
If shelfConfigurationId is not provided in Application URL*, Agent Assist will fallback to the first configuration on Agent Assist Configurator on your account.
Iframe Sandbox Options allow-scripts,allow-same-origin,allow-forms,allow-modals,allow-popups
Group filtering = select groups of users that will have access to the widget if you want only certain users to have access to the integration.
Iframe Sandbox Options allow-scripts,allow-same-origin,allow-forms,allow-modals,allow-popups
Group filtering = select groups of users that will have access to the widget if you want only certain users to have access to the integration.
Queue Filtering - select queues that will have access to the widget if you don’t want for the integration to be available on all queues of your Genesys Cloud instance.
Communication Type Filtering (Use this to limit the types of interactions (chats, voice, etc.) that are applicable for your Interaction Widget) - webmessaging
3. Click on the Advanced tab, paste the following code, and save the changes (only applicable to US hosted):
{ "lifecycle": { "ephemeral": false, "hooks": { "stop": false, "blur": false, "focus": false, "bootstrap": false } }, "i10n": { "en-us": { "name": "Shelf Agent Assist for Web Messaging" } }, "icon": { "48x48": "https://static.shelf.io/images/logo/shelf_50x50.png", "24x24": "https://static.shelf.io/images/logo/icon-pure-black-64x64.svg" }, "monochromicIcon": { "vector": "https://static.shelf.io/images/logo/icon-pure-black-64x64.svg" } } |
4. Go to Integrations and set your widget to Active.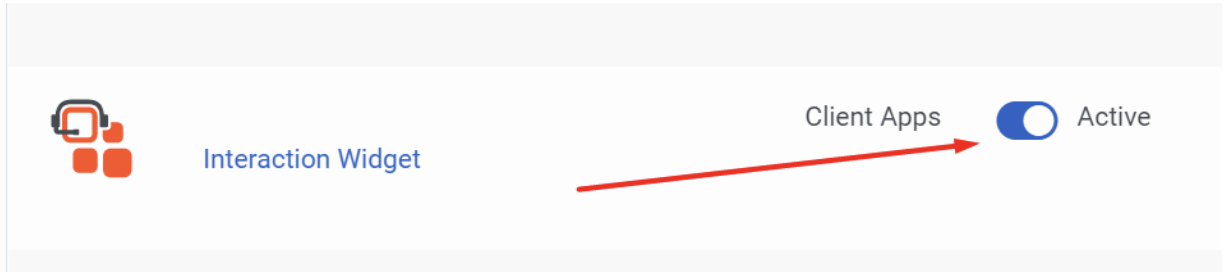
Configure Agent Assist As Script
- Go to Admin -> Scripts and create a script.
- Add web page and set Web Page Source to https://purecloud.shelf.io/suggestions-script/?conversationType=social-media&environment=mypurecloud.com&conversationId={{Scripter.Interaction ID}}
- Please note that because the Web Page being referenced is expecting a variable to be passed which is omitted during setup, it may reply with a Bad Request (as viewed below). This will be resolved when this script is accessed normally.

- Please note that because the Web Page being referenced is expecting a variable to be passed which is omitted during setup, it may reply with a Bad Request (as viewed below). This will be resolved when this script is accessed normally.
- Go to Script Properties and enable Message feature

- Save and Publish script.

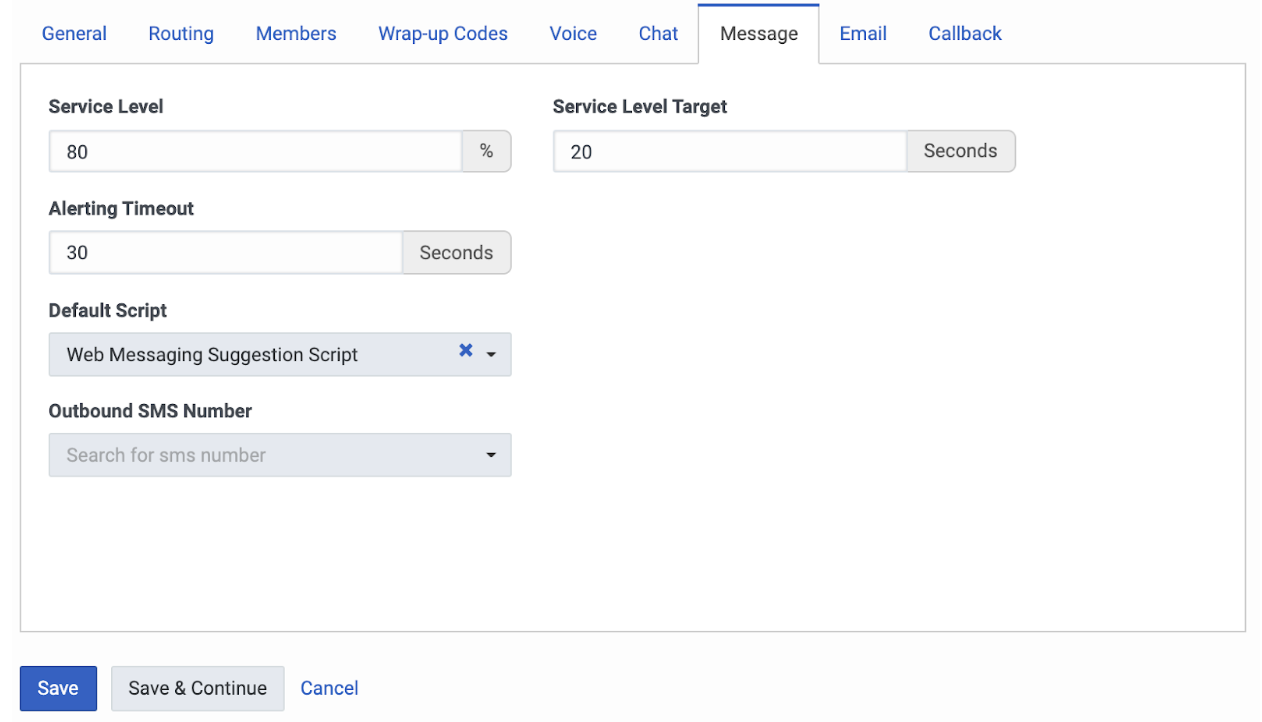
- Open previously created Queue, open Message tab and set default script to created above.