
There are two ways to easily add content to Shelf from your desktop and/or file server. They are:
1. The Create button, found along the top of the application, to the left of the Search bar.*

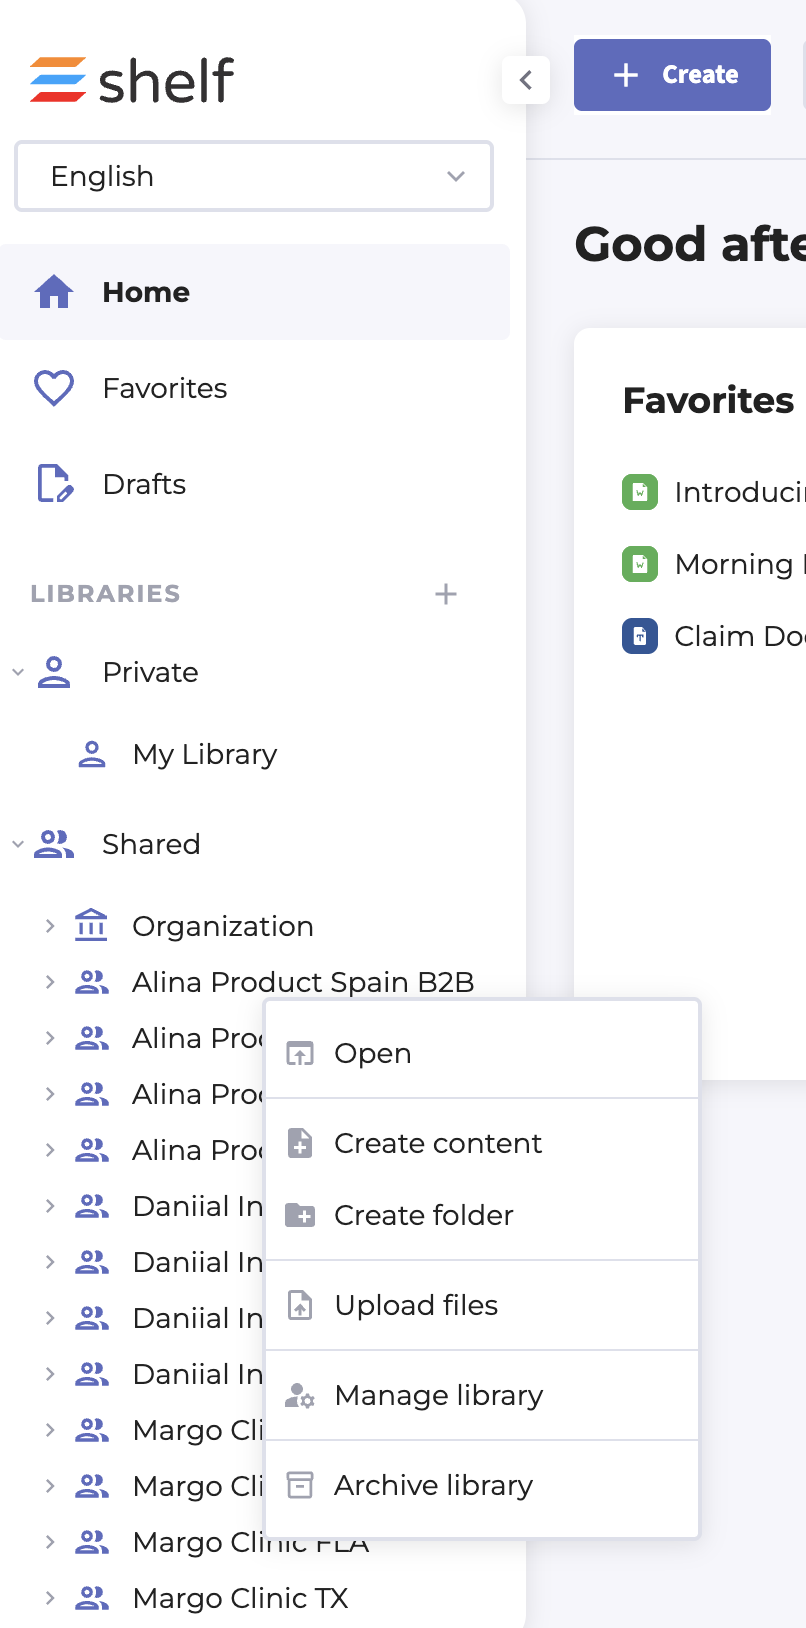
2. By accessing the right-click menu off the Library, Group, or Folder where you want to upload this content to. Access these locations via Library Tree structure found in the top portion of the left sidebar of the application underneath Libraries.
When adding content to Shelf, you will be prompted review selected location in Shelf where the content is to be saved, after selecting the files on your desktop or file server that you wish to upload.
Once you’ve initiated the upload process, you will see a Progress Bar in the top right corner of the application that tracks the upload process for each file. As each file is successfully uploaded, its status will be updated to display a green checkmark, which confirms that the file has been successfully added to Shelf.
*Method 1 also allows a user to manually add a single piece of content via the Touchpad. This approach allows the user to manually enter additional information about the content, prior to the upload. Click here for additional details on adding content via the Touchpad.
© Shelf all rights reserved.